Get Python-ready!
What are Python and Jupyter?
What is Python!? Well, Python’s awesome! Enough said.
We will be using Python for our econometric data work. The way we interact with Python is through so-called Jupyter notebooks. Our friends from https://quantecon.org clarify:
What are Jupyter notebooks?
Jupyter notebooks are one of the many possible ways to interact with Python and the scientific libraries.
They use a browser-based interface to Python with
The ability to write and execute Python commands.
Formatted output in the browser, including tables, figures, animation, etc.
The option to mix in formatted text and mathematical expressions.
Because of these features, Jupyter is now a major player in the scientific computing ecosystem.
(referenced from here)
Yes, you heard that right: Jupyter notebooks allow you to run Python inside a web browser!
I hear you ask: Sounds awesome, but how in the world do I get started with Jupyter!? Well, two options (plus a third one that I don’t recommend):
Local install (preferred): Anaconda
Cloud based: Google Colab
I will explain these two in the next sections.
The third way of running Jupyter notebooks is actually via the Anaconda installation on the computers of the ANU Information Commons (the computers in the dorms, libraries, and various computer labs across campus). For example, you can log into the PCs in the Copland labs and start a Jupyter session there. We have tested this and while it works in principle, the execution is quite slow and the interaction with the H drive is a bit confusing. Also, you won’t be able to log into Jupyter via remote desktop access. For these reasons, we do not recommend this way of running Jupyter notebooks.
Anaconda
We suggest this as our preferred method. If you are the type of person who likes to run things on their own machine then you can install Python and Jupyter on your computer (ideally your laptop that you bring to the weekly labs). This will work on PC, Mac, and Linux. (Linux really is the way to go, by the way.)
Installation
Anaconda is the world’s most popular open-source Python distribution platform. If you go to https://www.anaconda.com/download/ you can download a free version of Anaconda which you can install on your own computer.
If you choose this option, then this will install a very rich Python environment on your computer which will include
the Python programming language itself (including all the libraries that we will ever need);
the Jupyter notebooks environment.
In addition it will install many other things which will enable you to take your Python programming even further.
I will not provide detailed installation steps, as Anaconda makes the process fairly easy.
Launching Jupyter
After successful installation you can launch Jupyter in these alternative ways:
via the Anaconda Navigator (through which you can start a Jupyter session)
Windows users: typing Jupyter in your search bar
using the command line interface or terminal prompt (search the web for details)
Do not launch ipynb-files by double clicking on them within your File Explorer!
Organising your folders
One thing is important however: I do need you to be careful about your folder structure for EMET2007. I would like you to create three folders:
Folder
EMET2007somewhere in a good location on your computerDo use precisely this spelling (case and space sensitive!). Do not use
EMET 2007orEmet2007or anything else!Folder
notebooksinside theEMET2007folderThis folder will collect all the Jupyter notebooks that you write this semester.
Folder
datasetsalso inside theEMET2007folderThis folder will collect all the Excel data sets that we will be analysing this semester.
In the future, when you start and save a new Jupyter notebook, be sure to do so inside the
notebooks folder.
Google Colab
With Colab you are essentially running Python in a Jupyter notebook on a remote (cloud) computer provided by Google. For small applications (such as ours) this is free of charge. You do, however, need a Google account.
The way you access this cloud computer is via your web browser. With Colab there is no need to install anything, you can run Python from anywhere (provided a stable internet connection).
Because it all works remotely via your web browser you can run Jupyter notebooks in many different ways: from the university computers, your laptop, your desktop at home, your iPad, your Samsung Galaxy, iPhone 18, Nokia 6110, Commodore 64, Nintendo Switch, you get the point.
Here I’m guiding you through the necessary steps to set up Colab. You need
a reliable internet connection;
a Google account (Gmail).
It looks complicated with a lot of steps, but I promise you that it is actually quite easy. I’m just providing every little tiny step below, which makes it seem long. At the end of all of this, you will have run your first Python code inside your web browser using the Jupyter notebook interface. Yippee!
Step 1
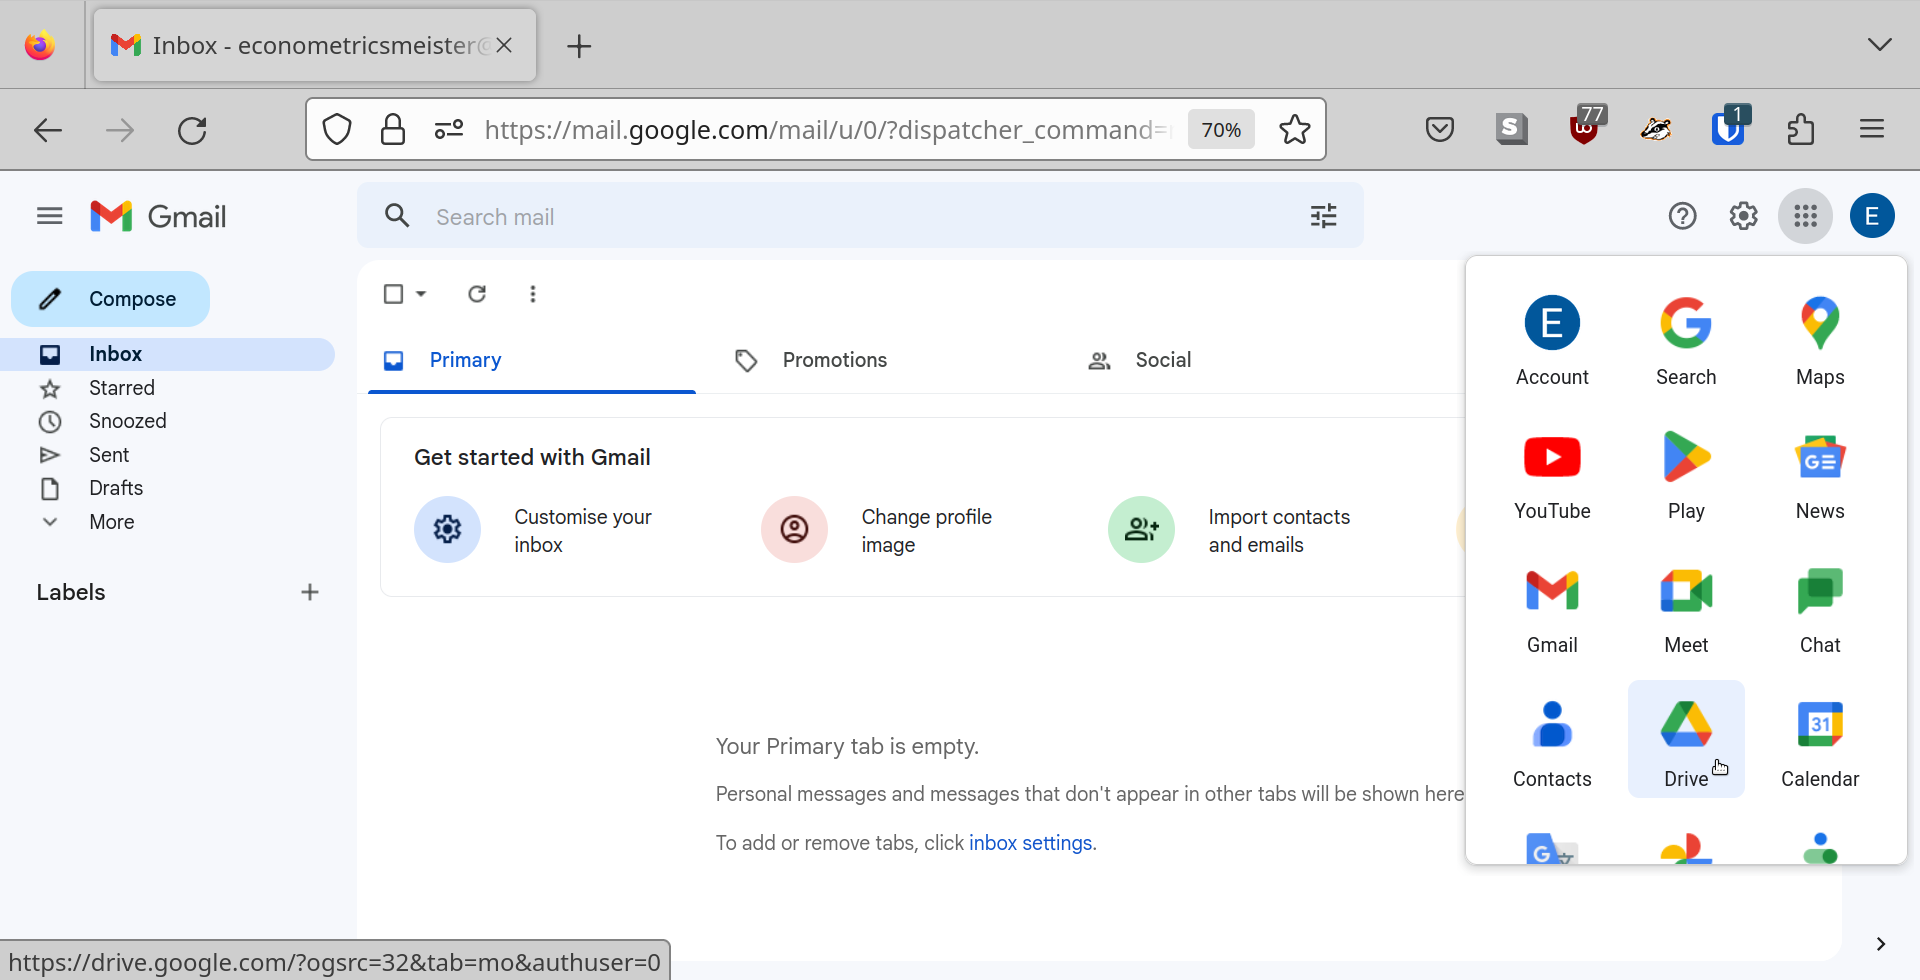
Click on the 9 dots icon in the top right corner and select Drive.
Step 2
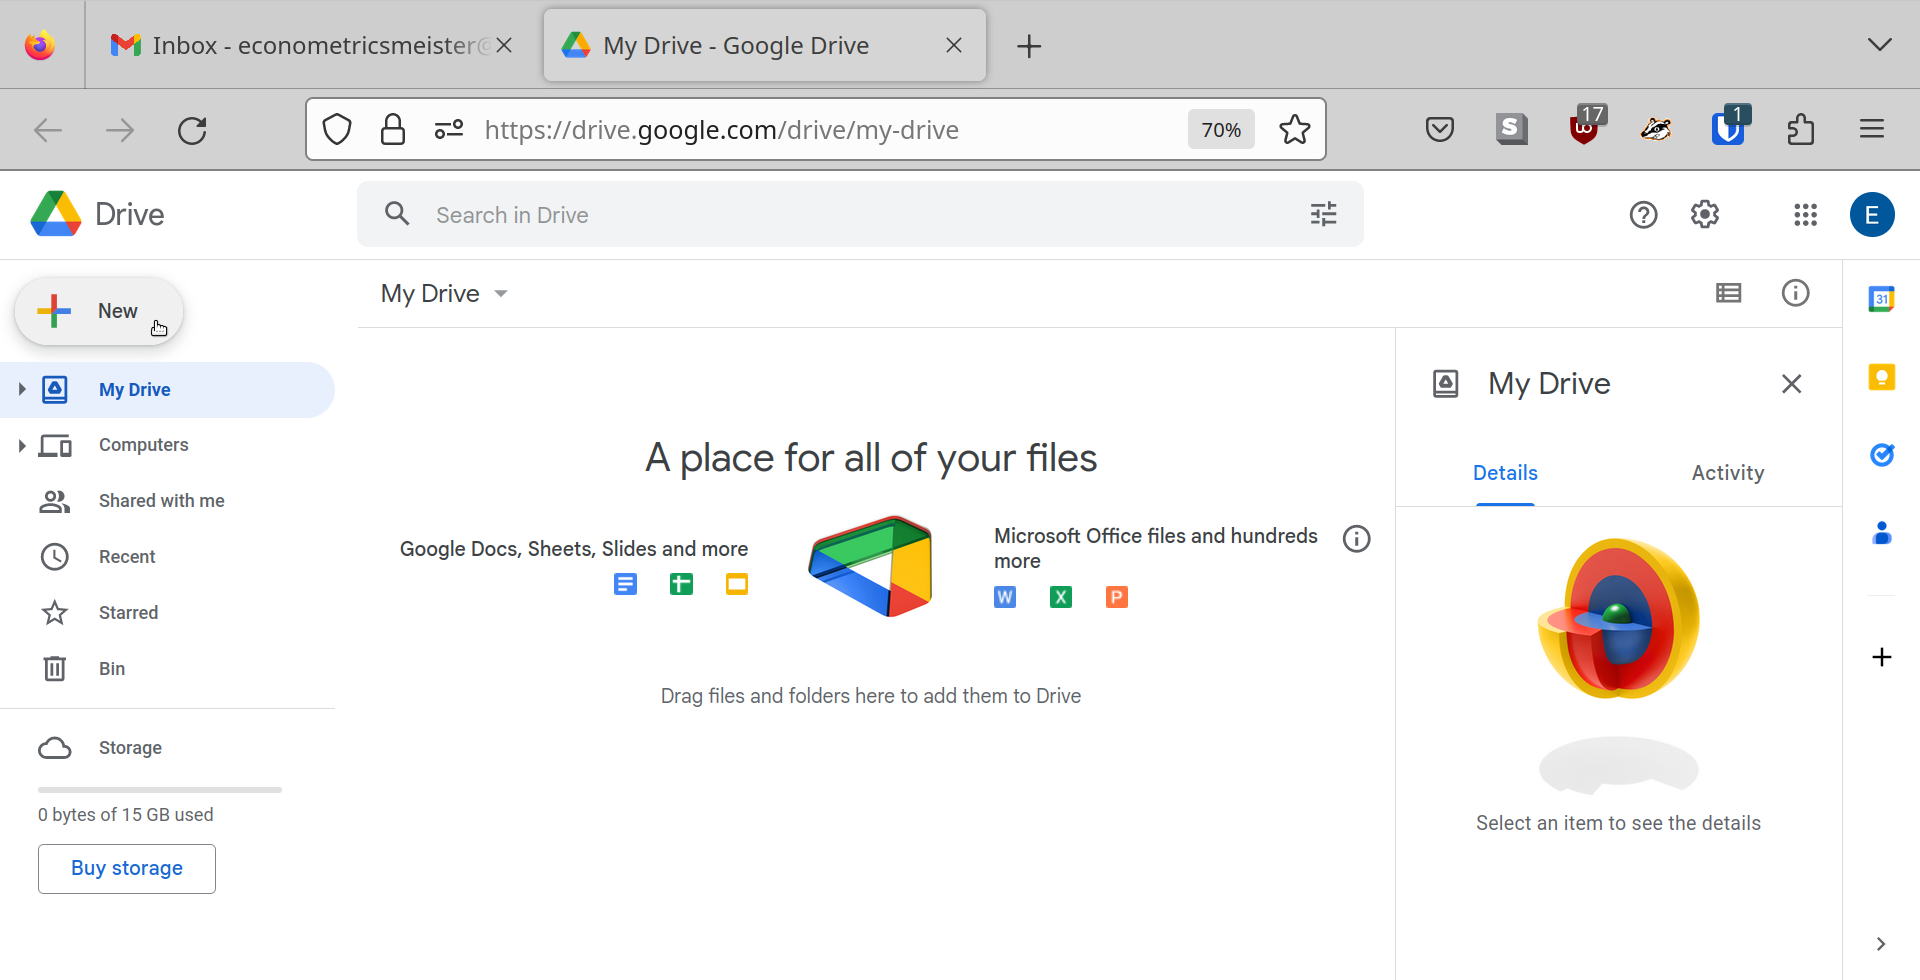
In Drive click New in the top left corner.
Step 3
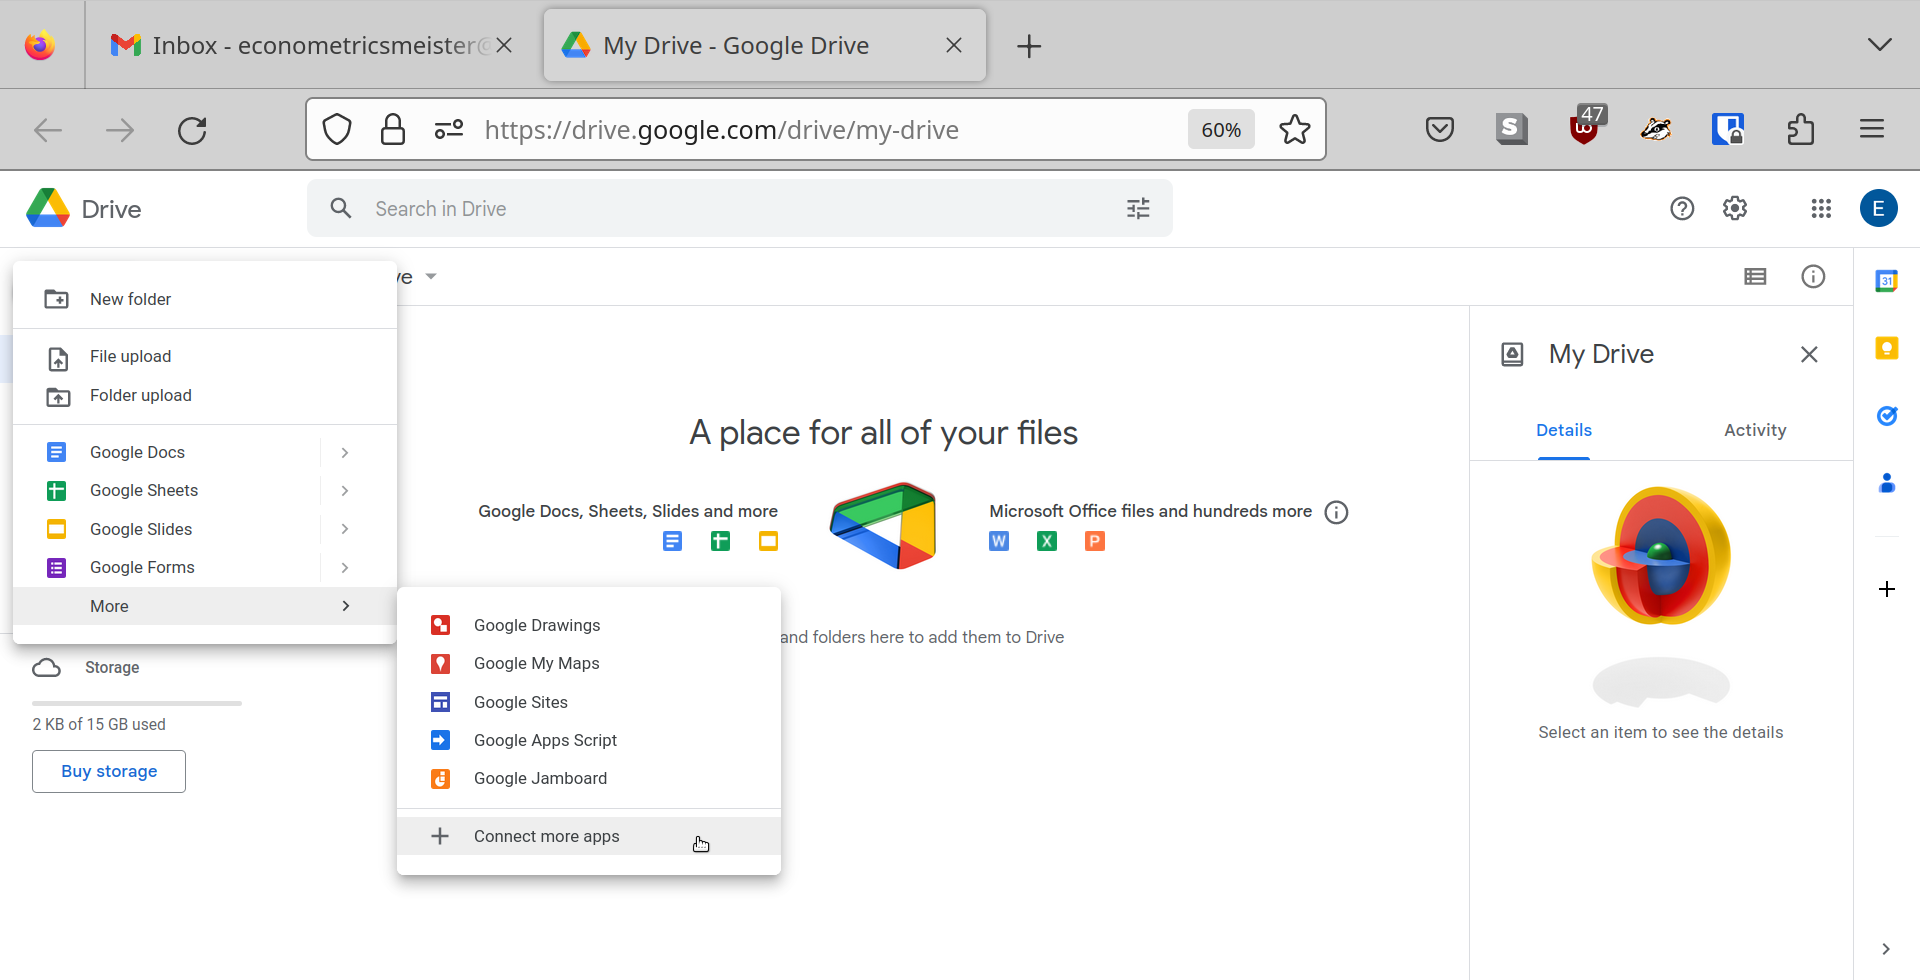
Select Connect more apps.
Step 4
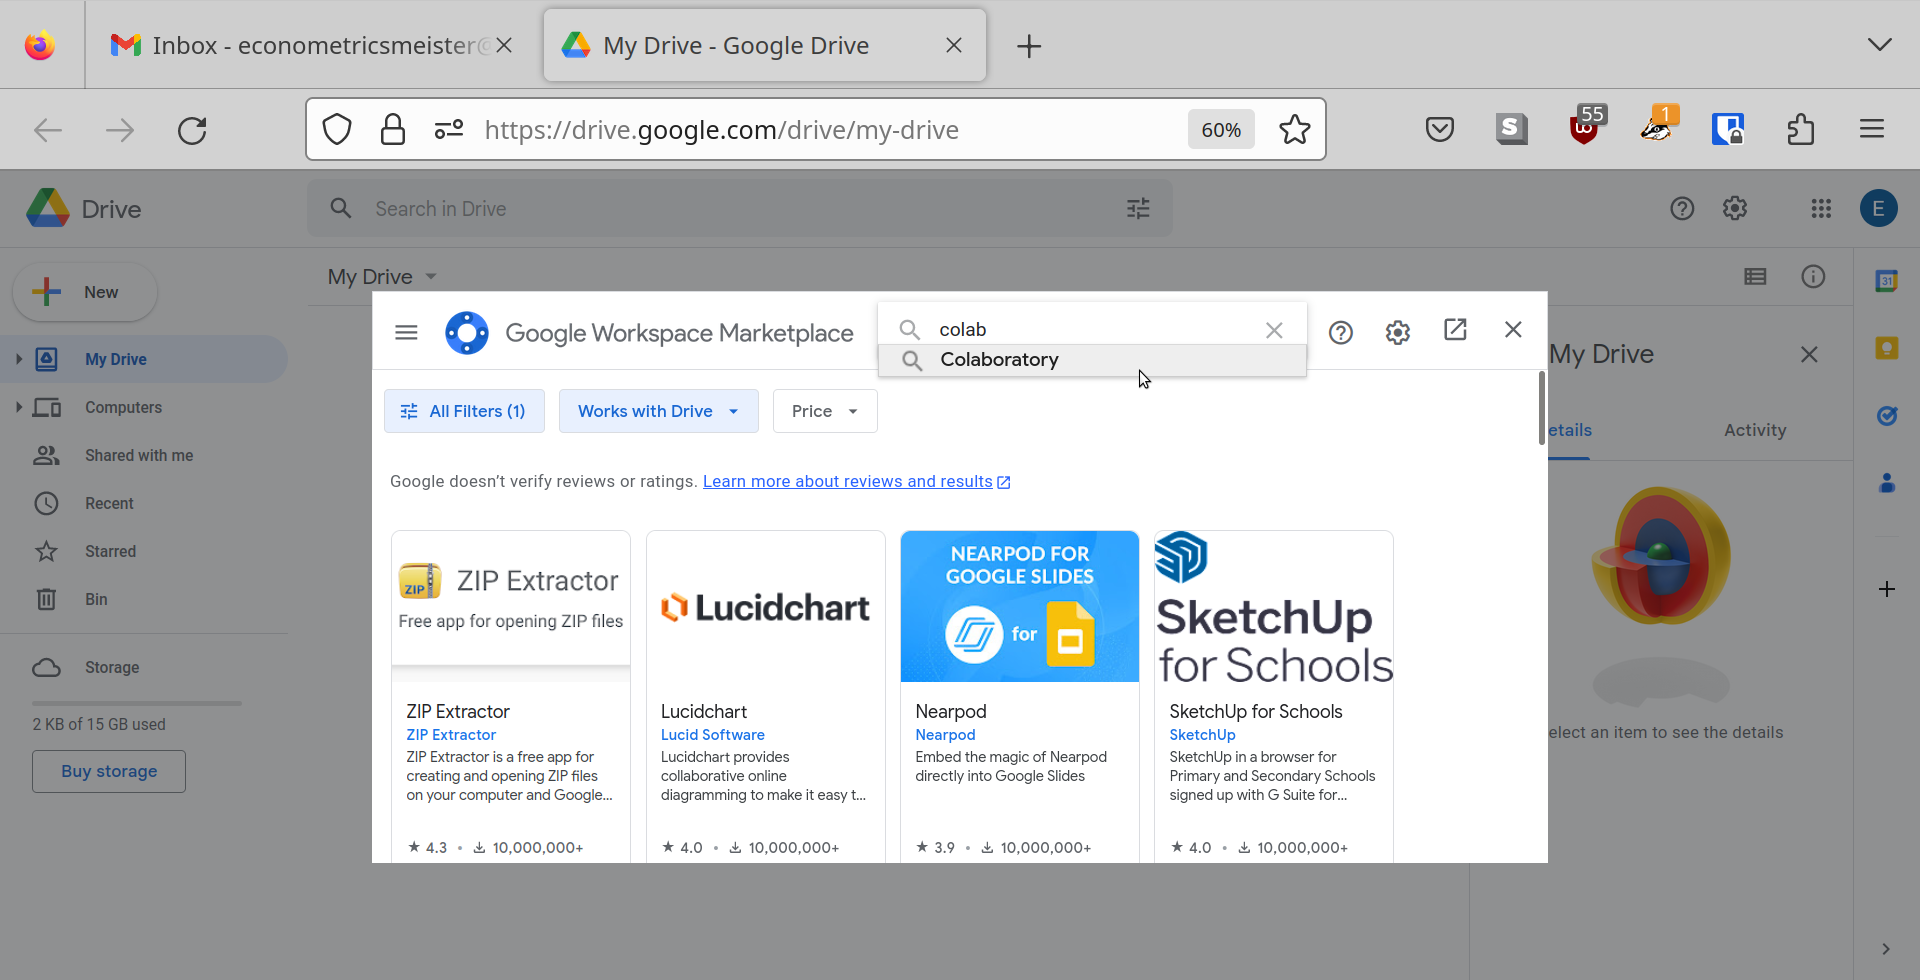
In the window that opens, type colab in the search bar and select Colaboratory.
Step 5
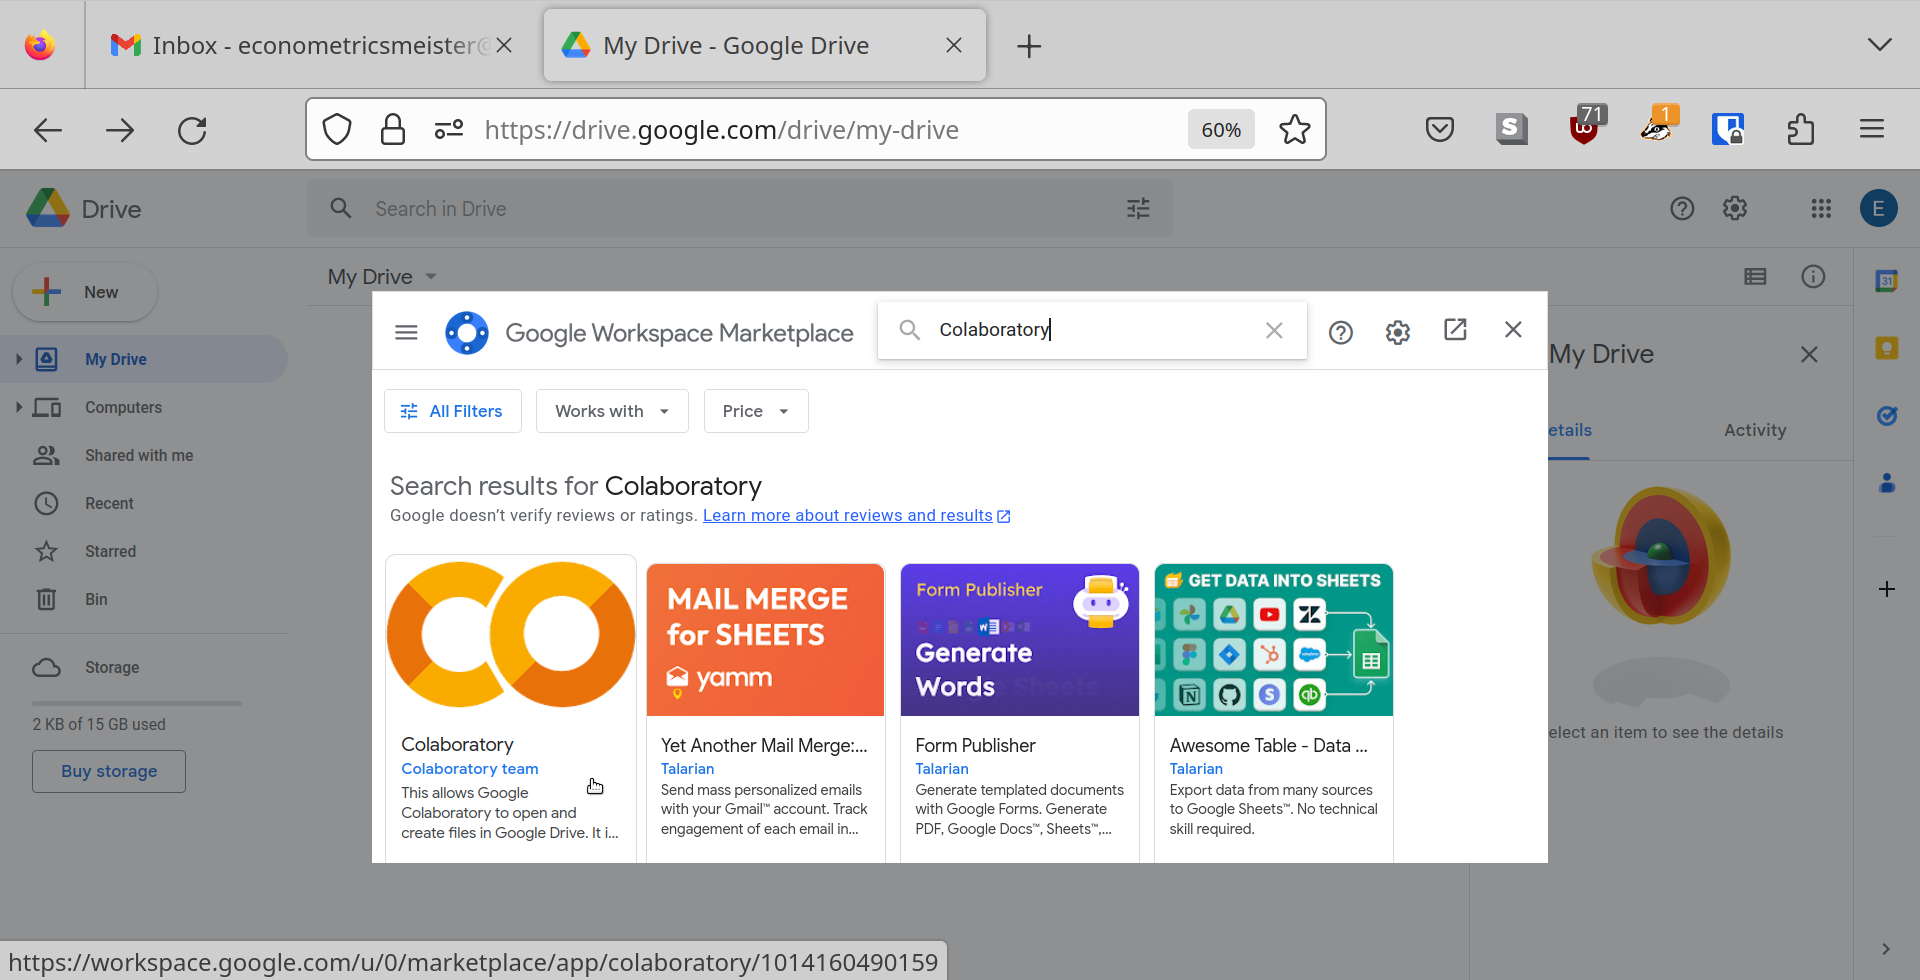
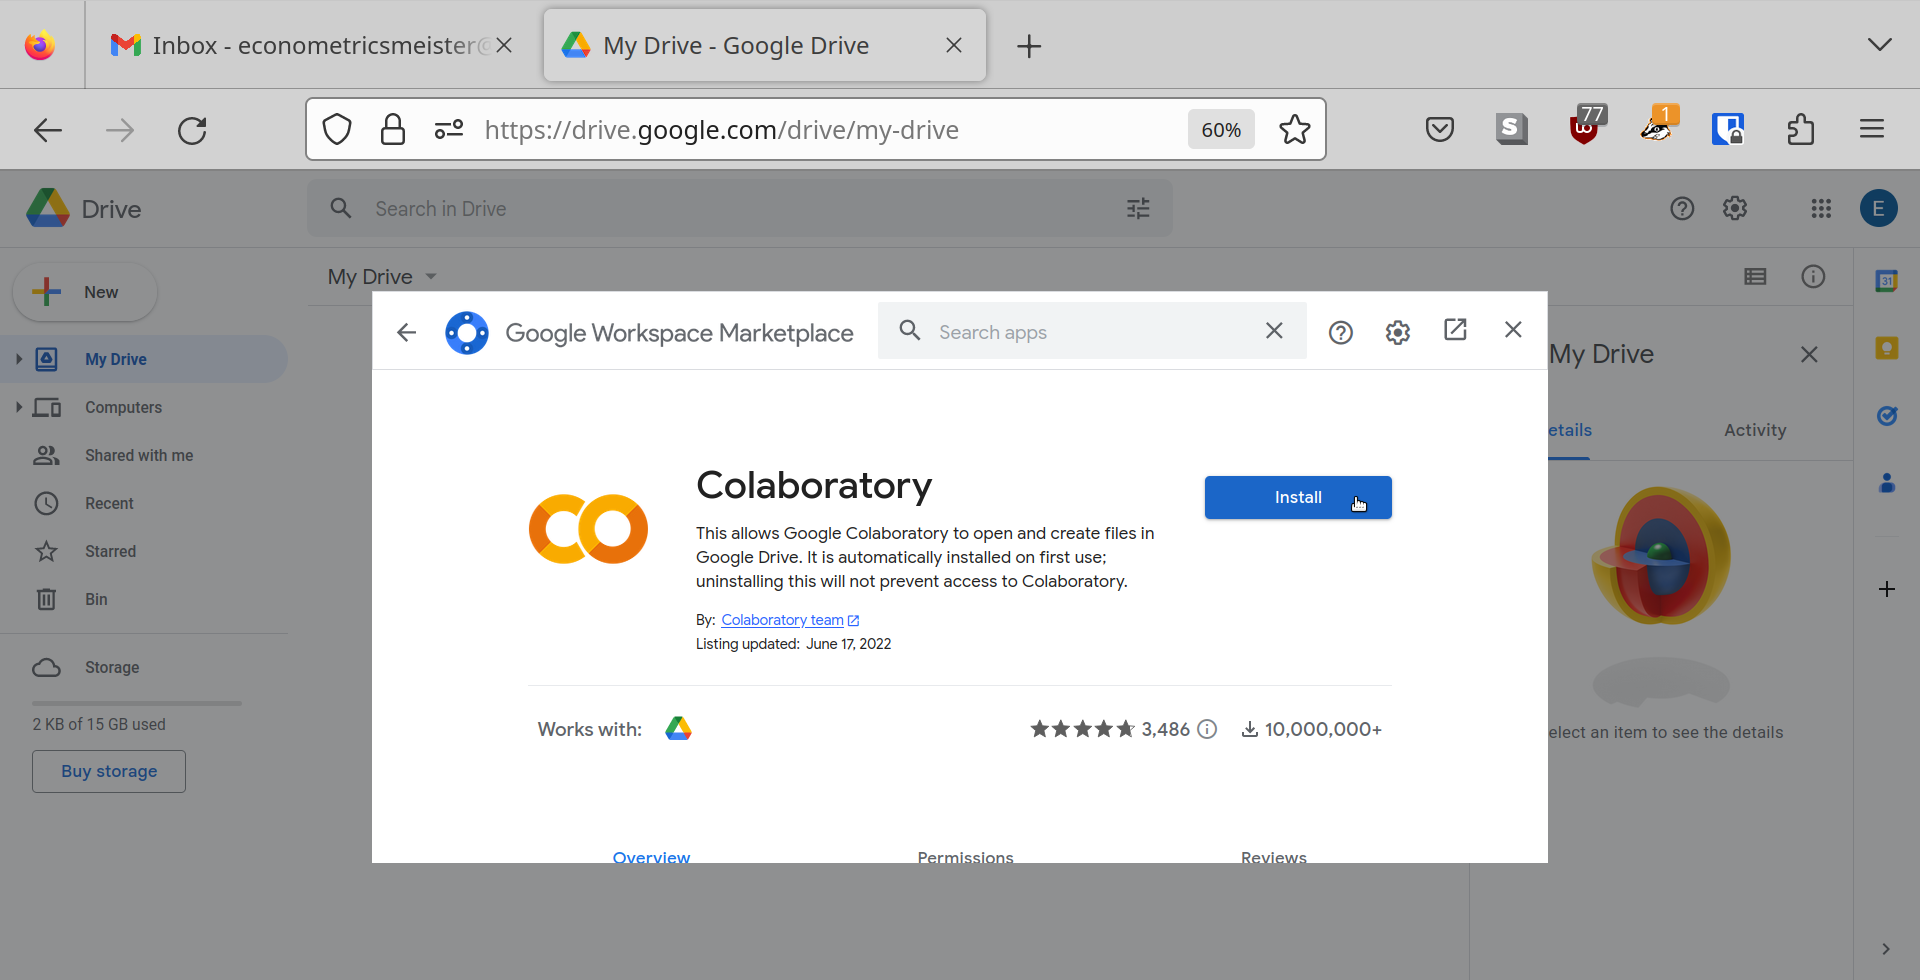
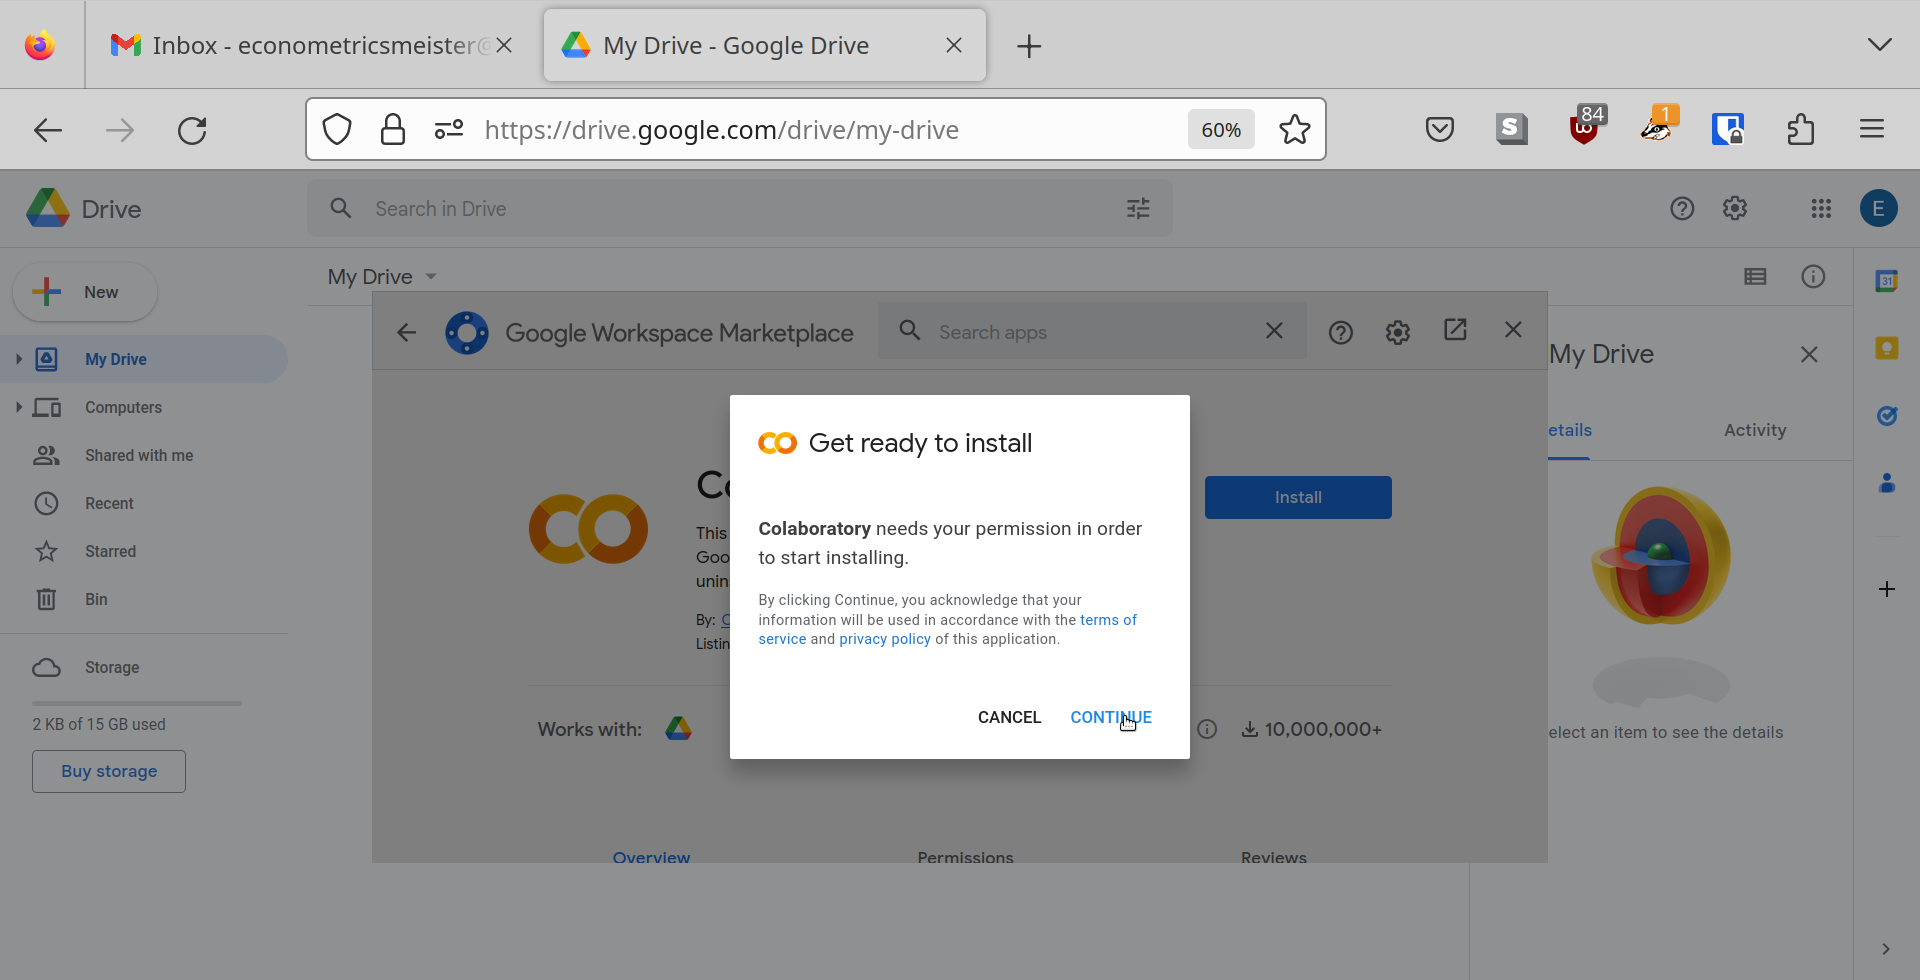
Click on the Colaboratory symbol to start installing it. Follow these easy steps:
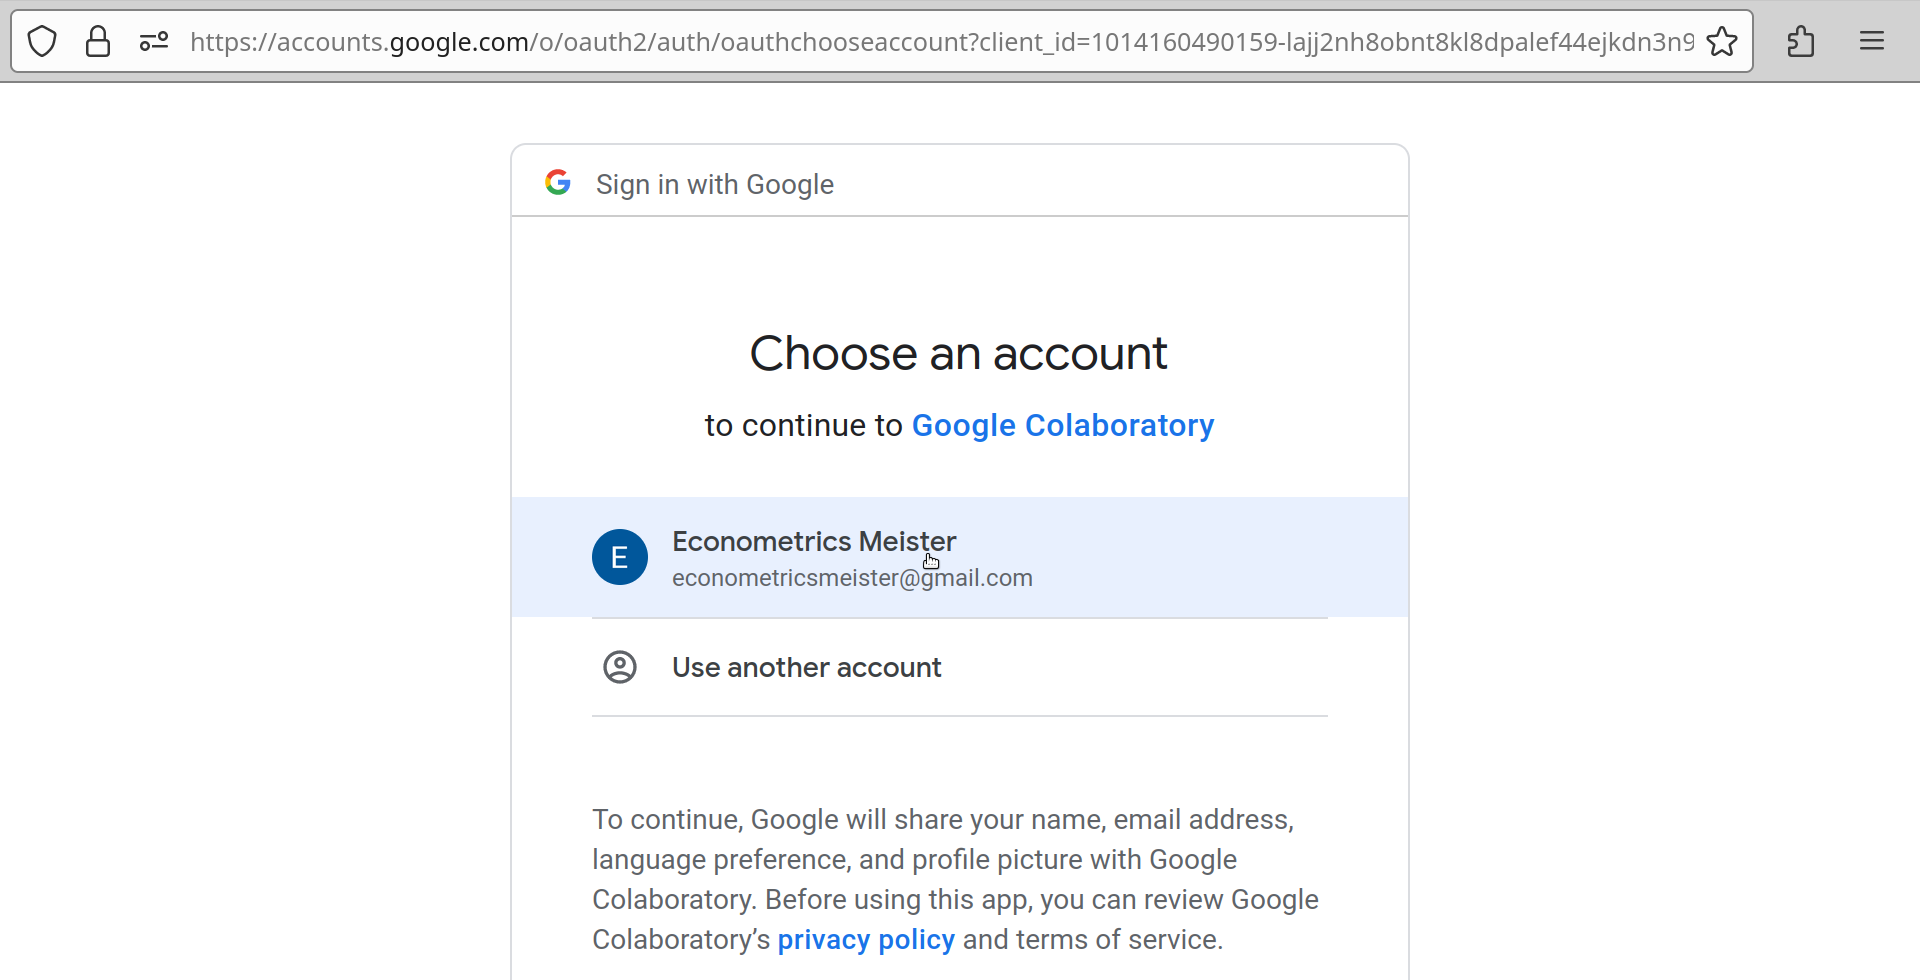
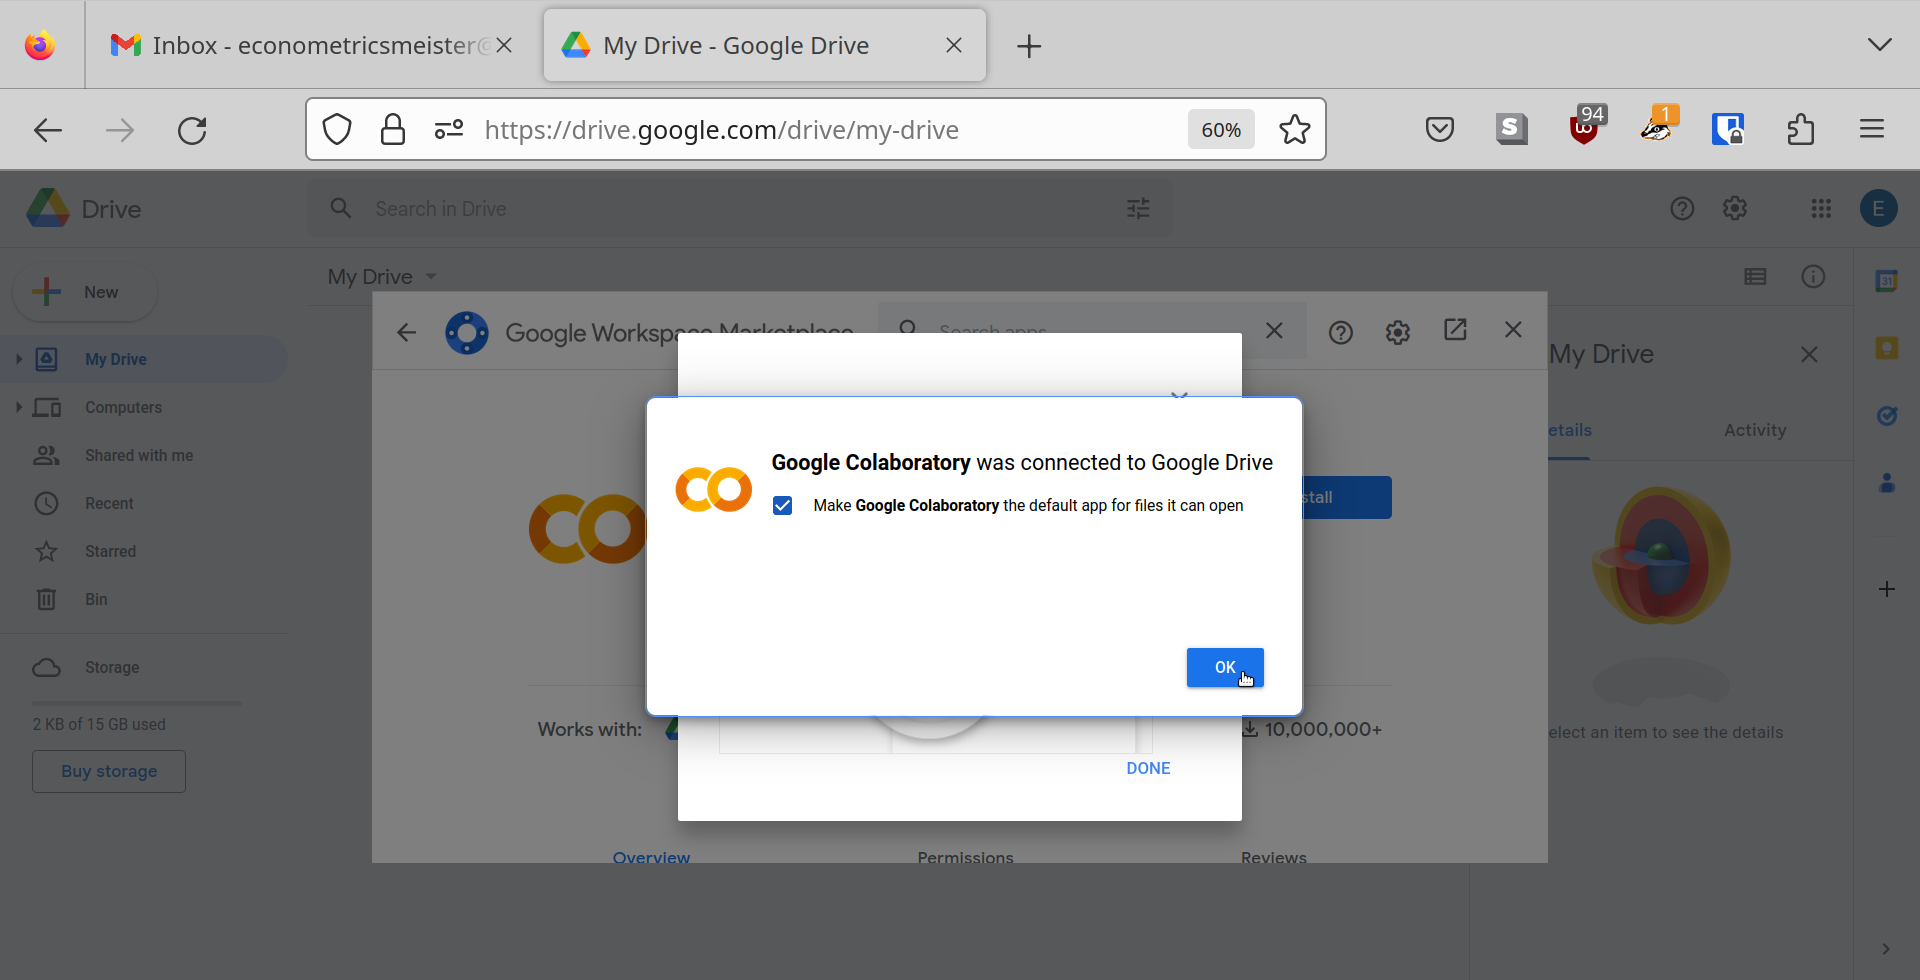
Step 6
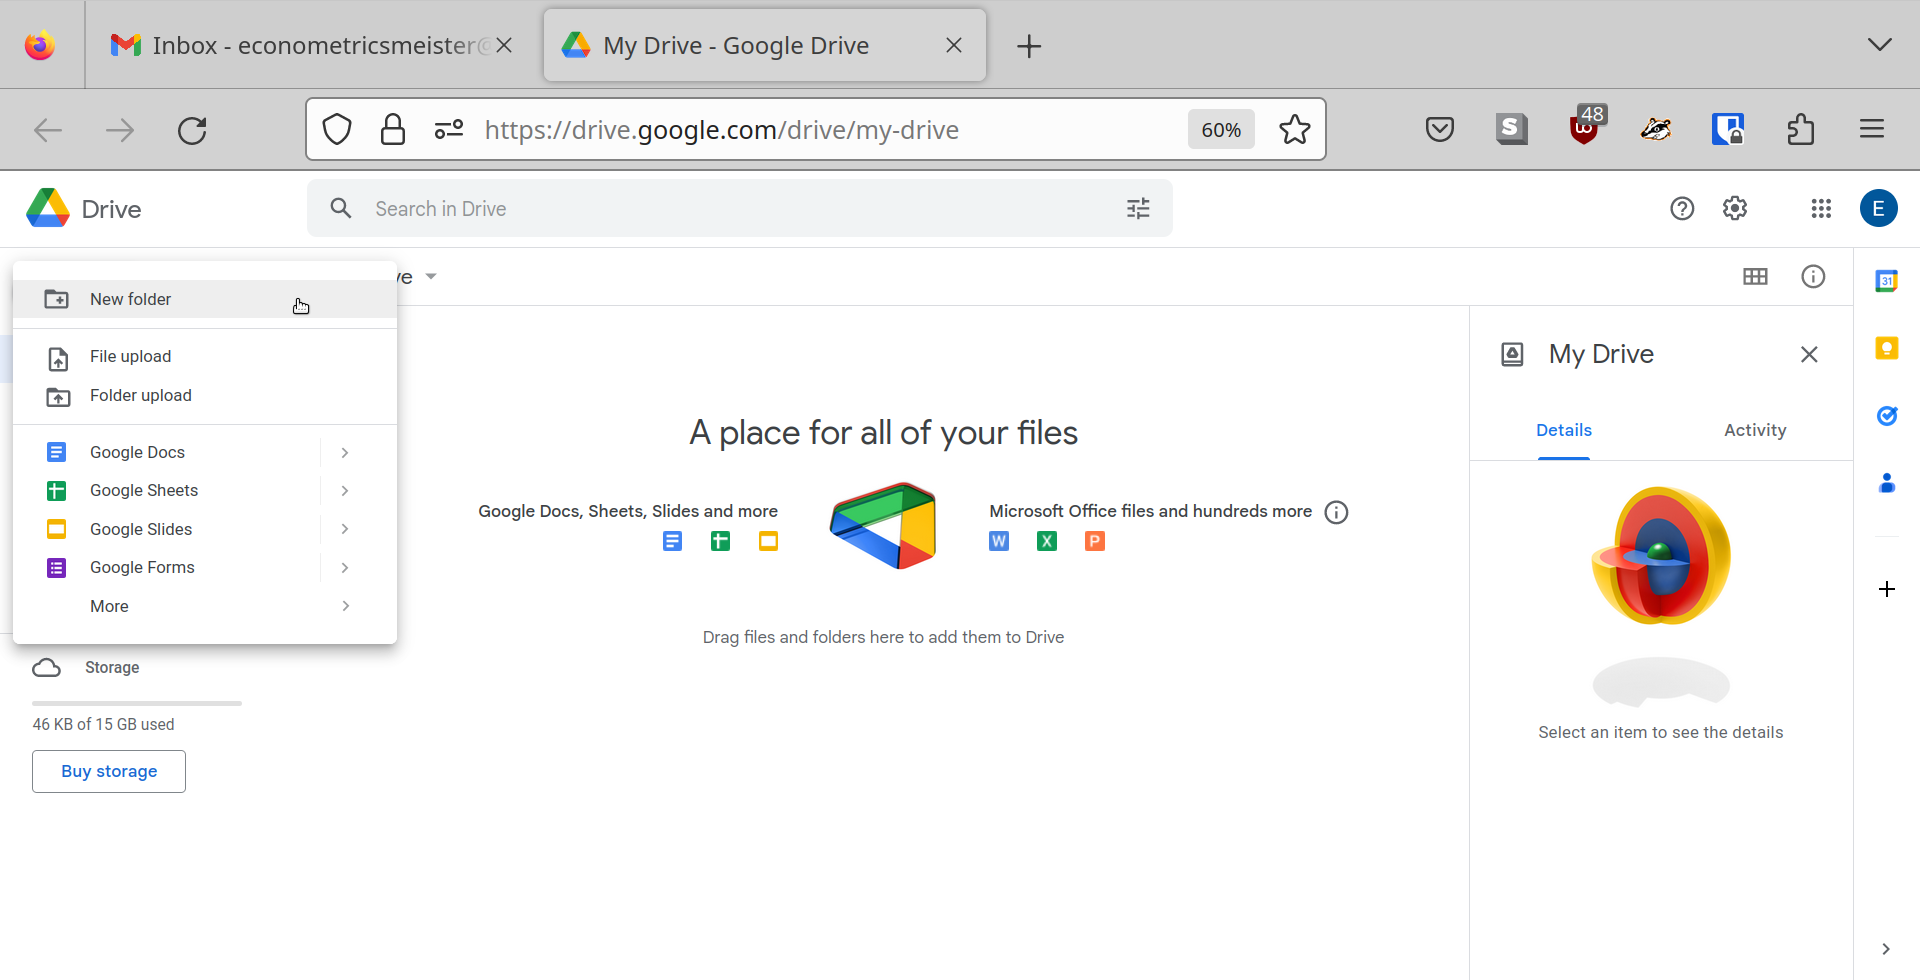
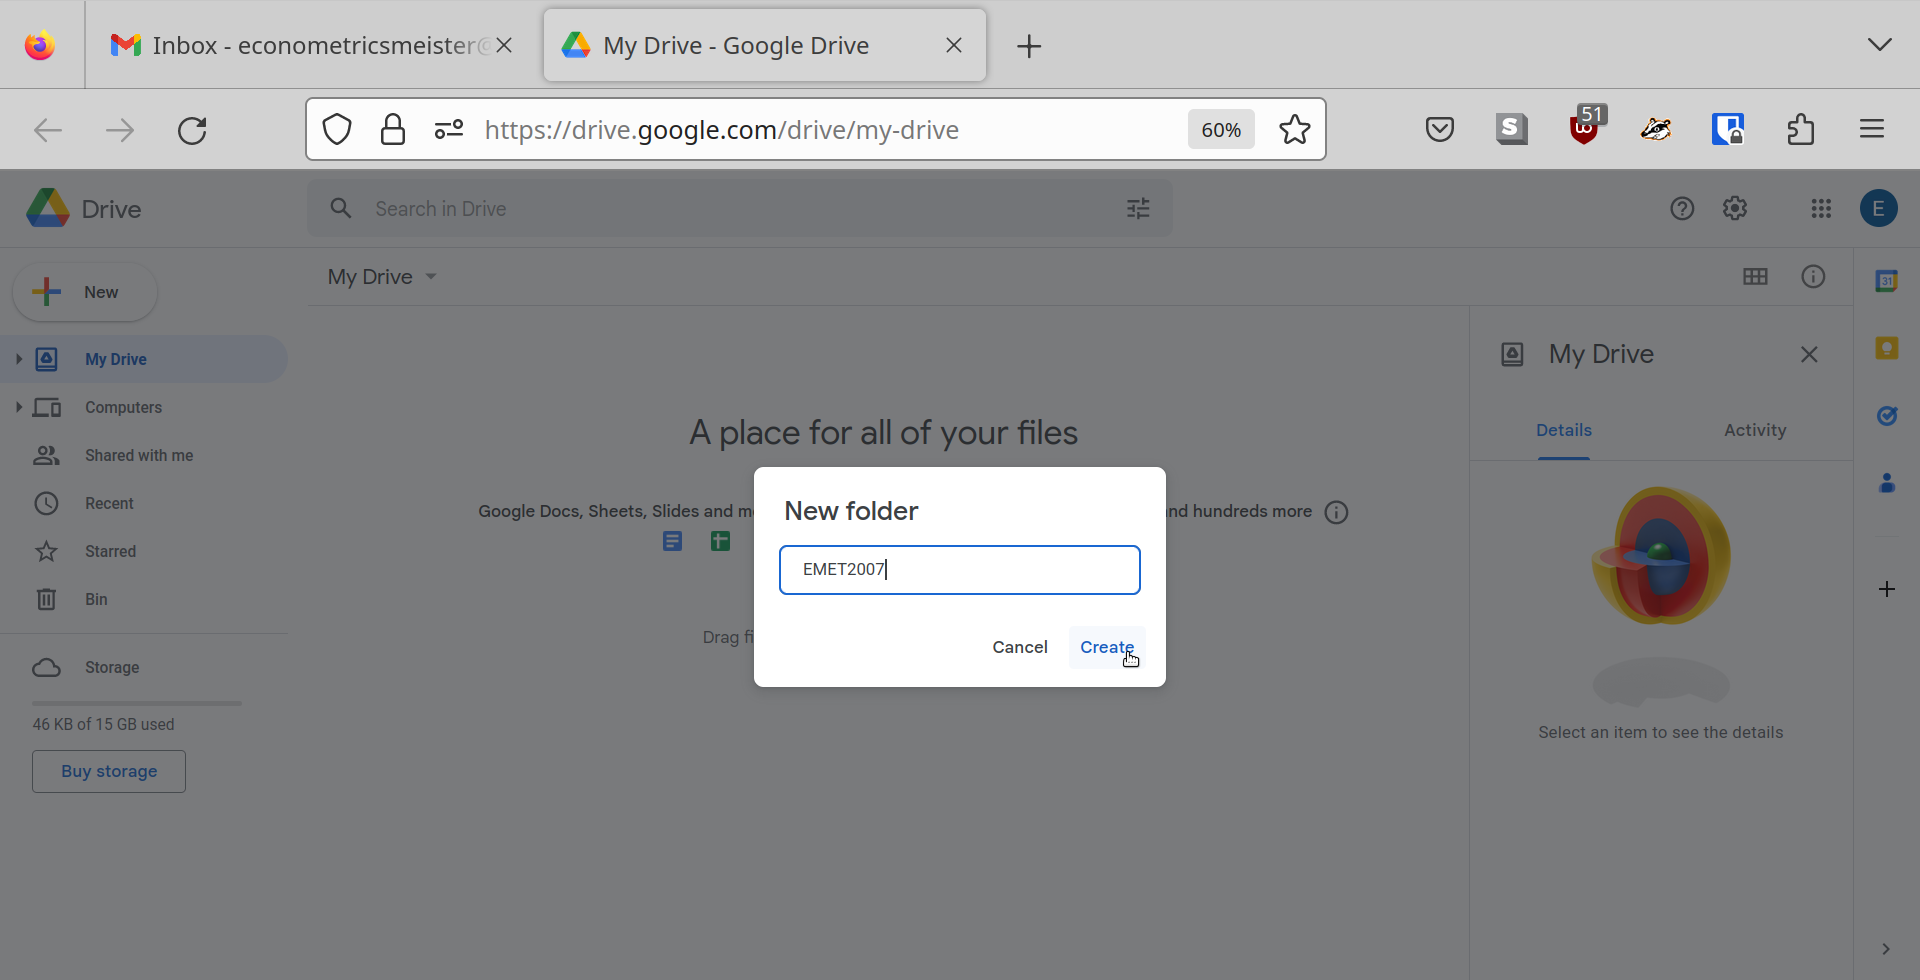
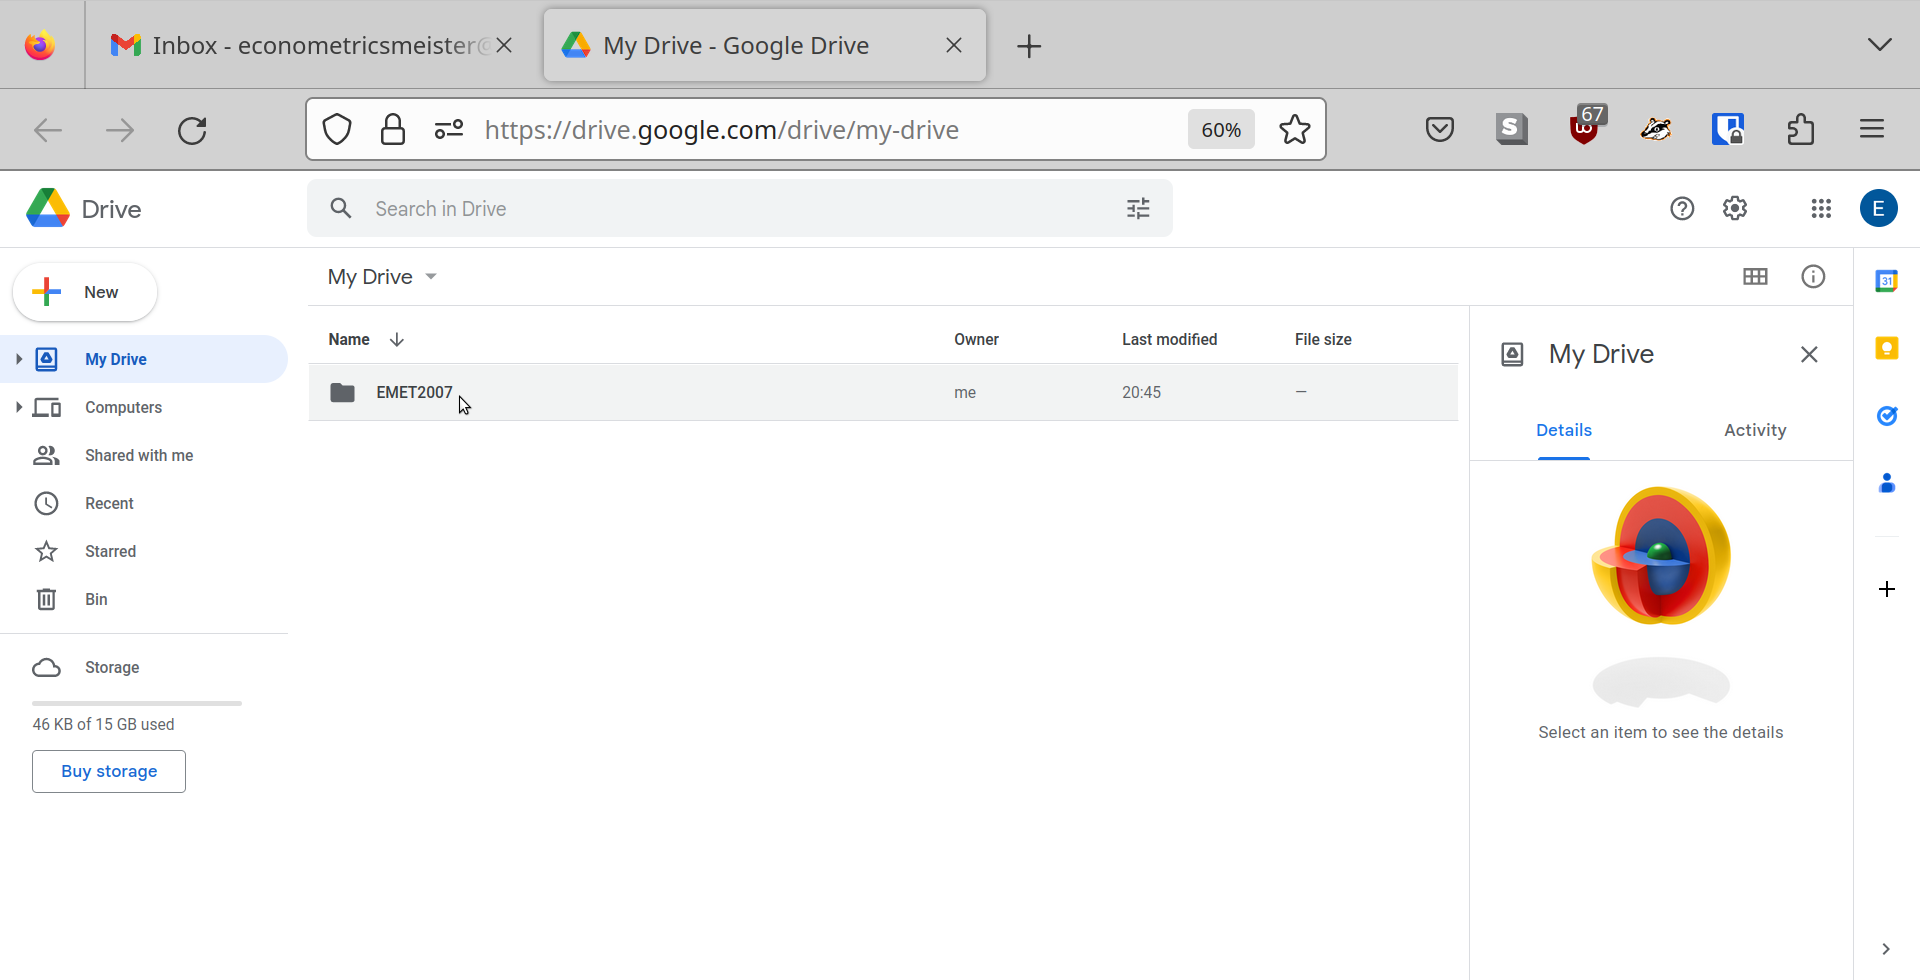
Create a new folder in Drive. Call that new folder EMET2007. Give it precisely that name. Do
not write EMET 2007 or Emet2007 or Emet 2007 or anything else that does not look like
EMET2007!
Step 7
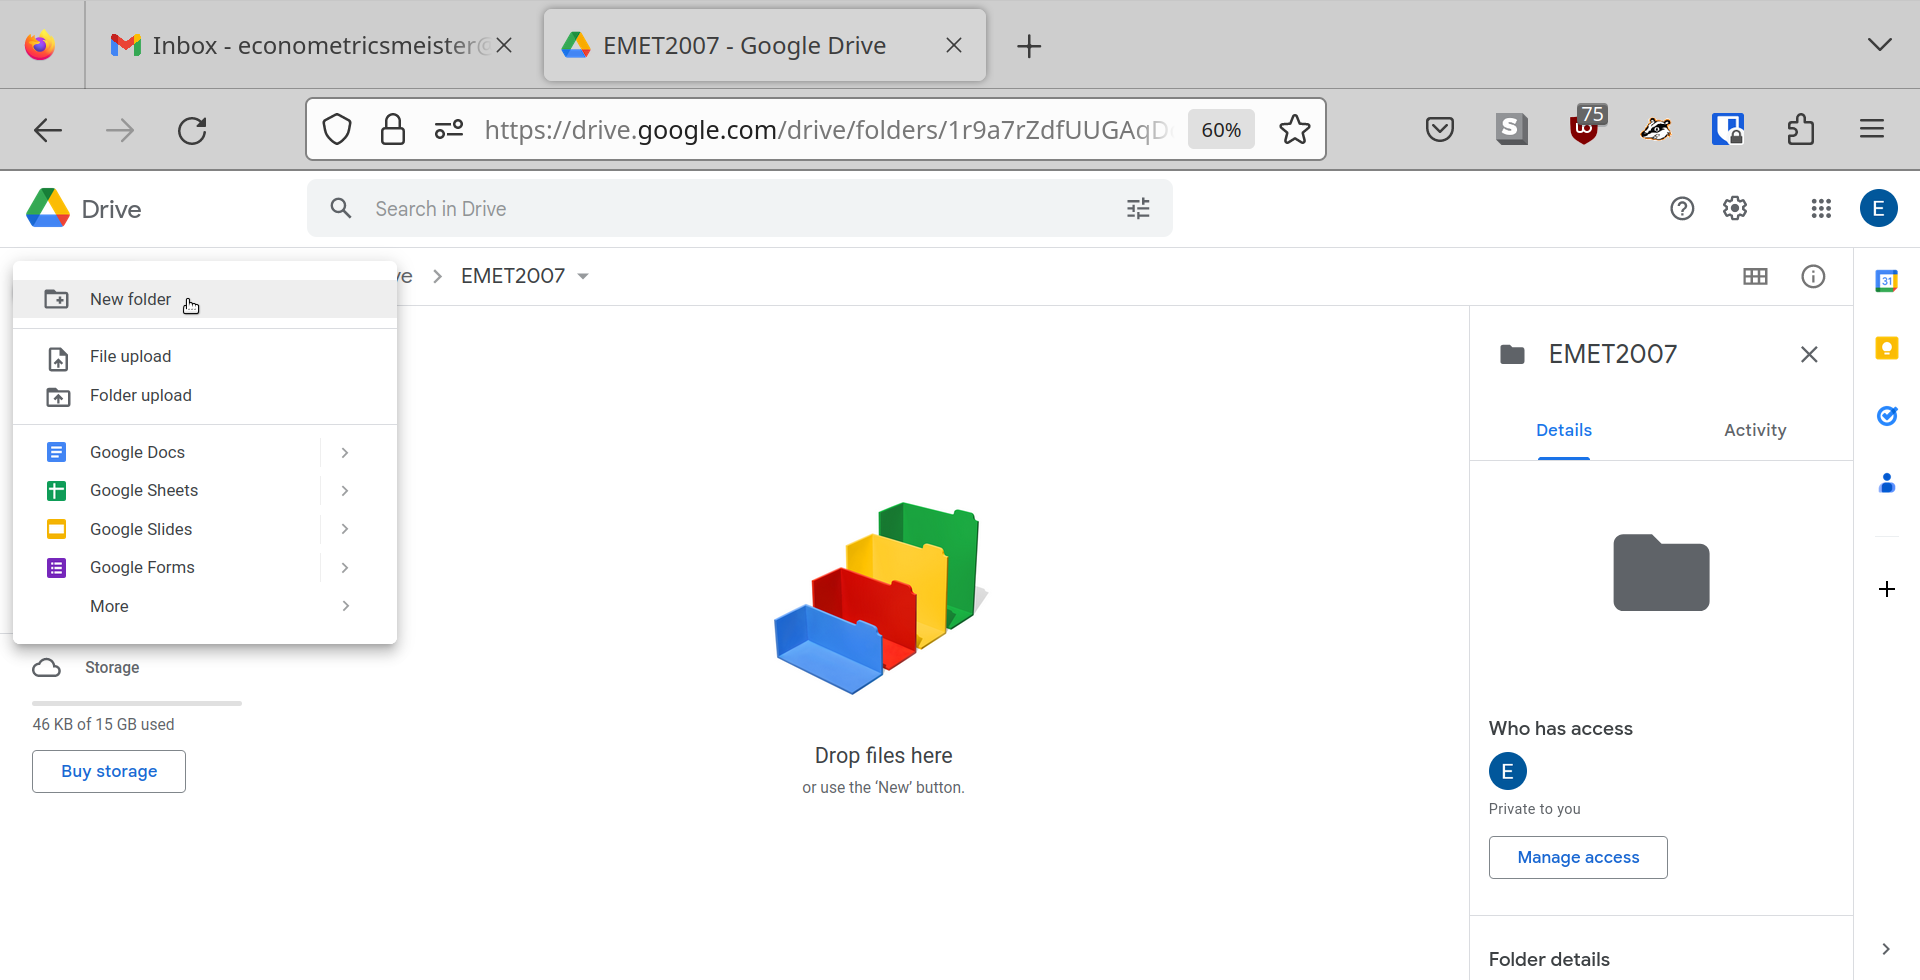
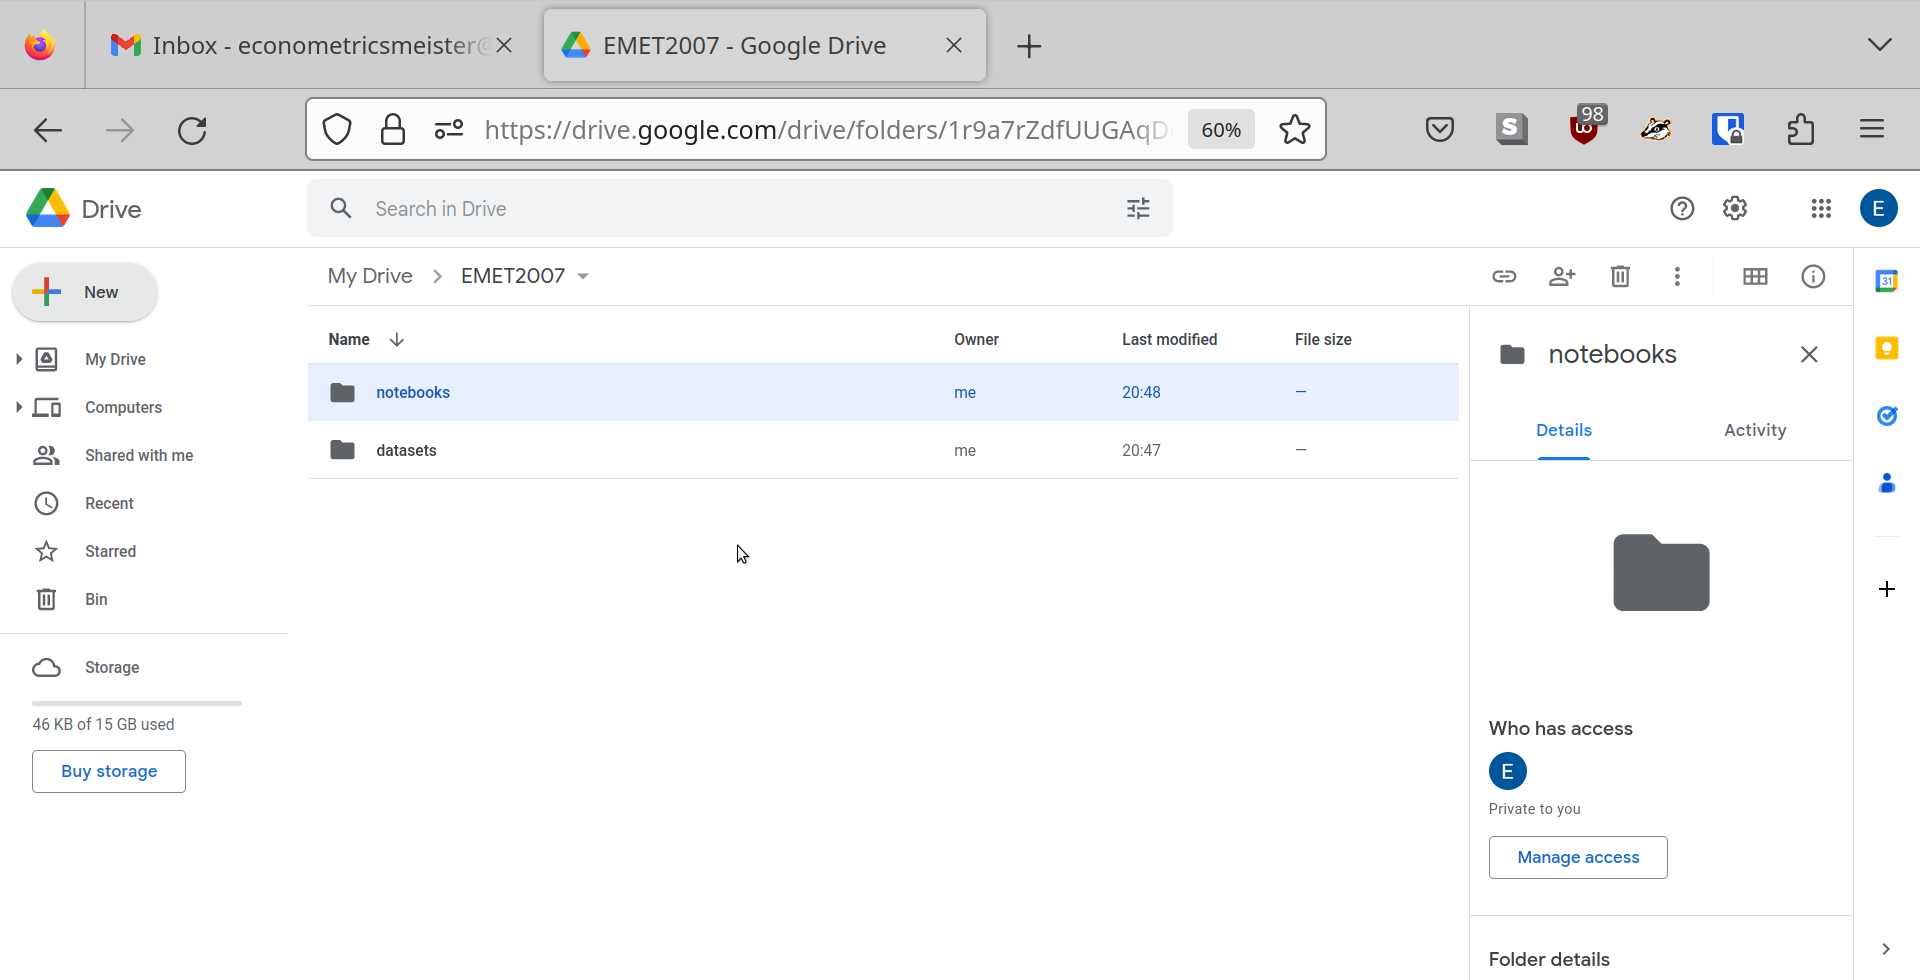
Go into your EMET2007 folder by double clicking on it. Create two new folders inside your
EMET2007 folder. Call these new folders notebooks and datasets. Give them precisely these
names!
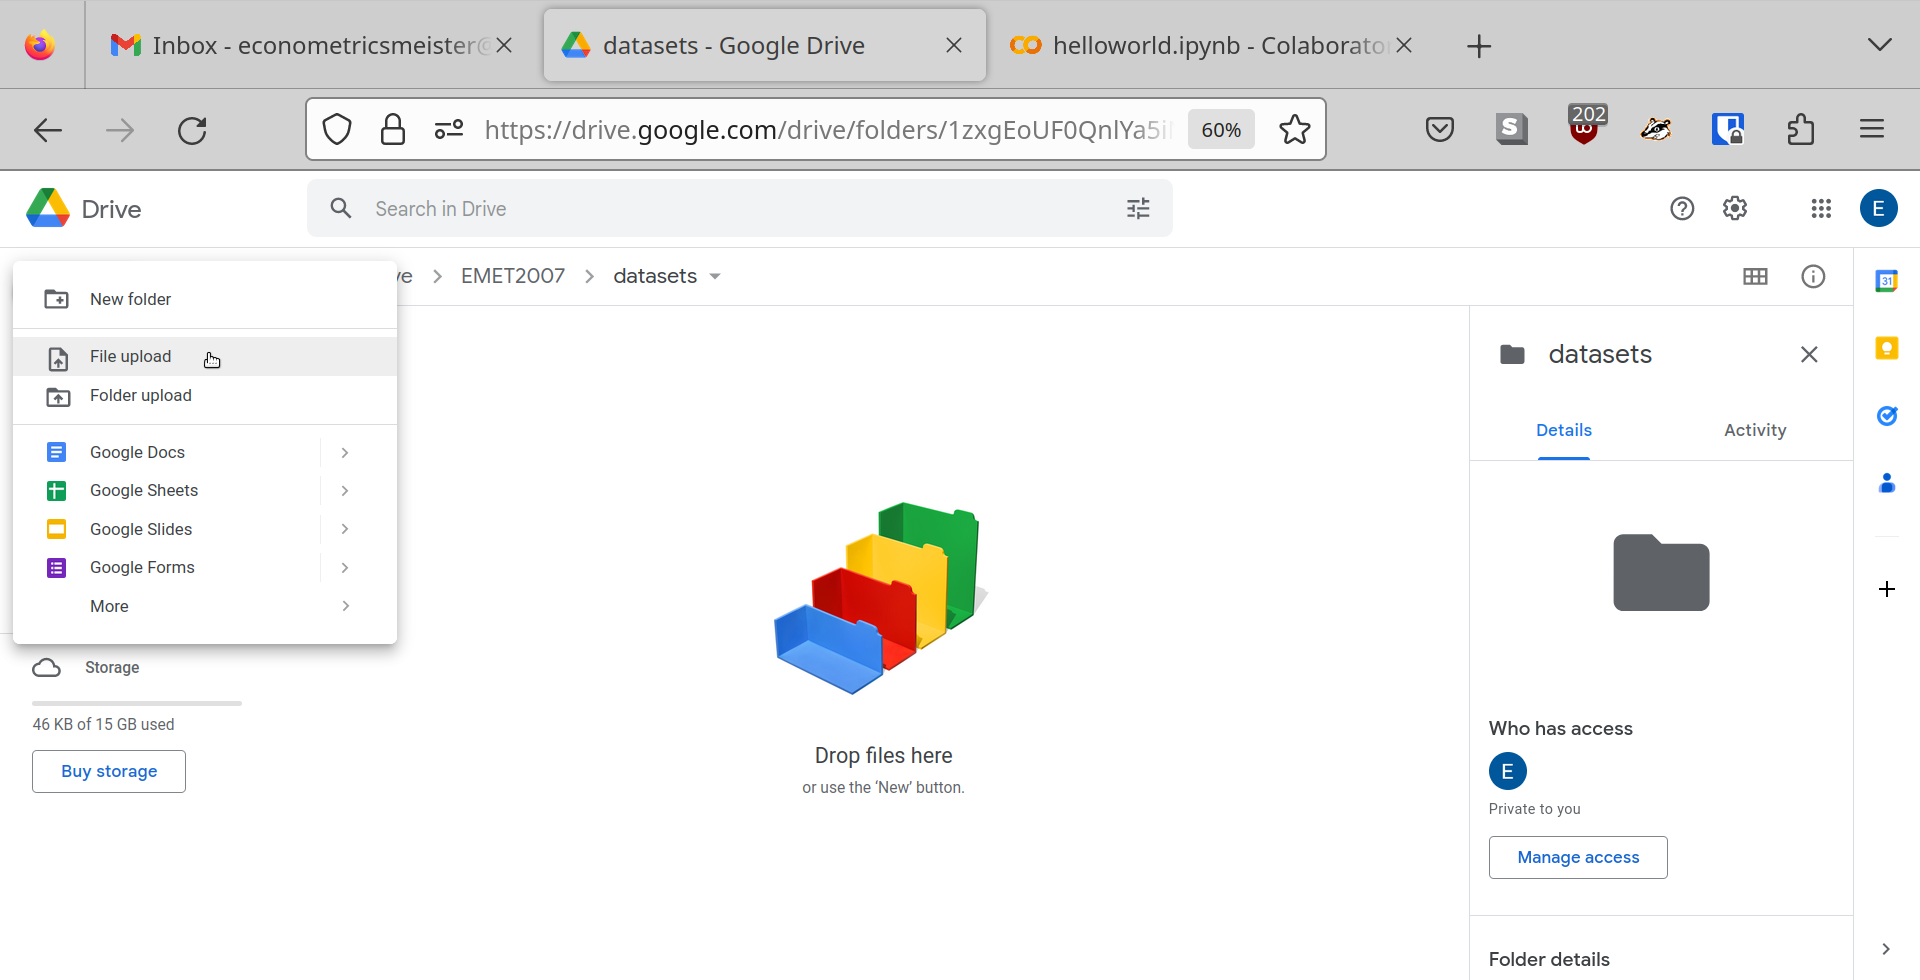
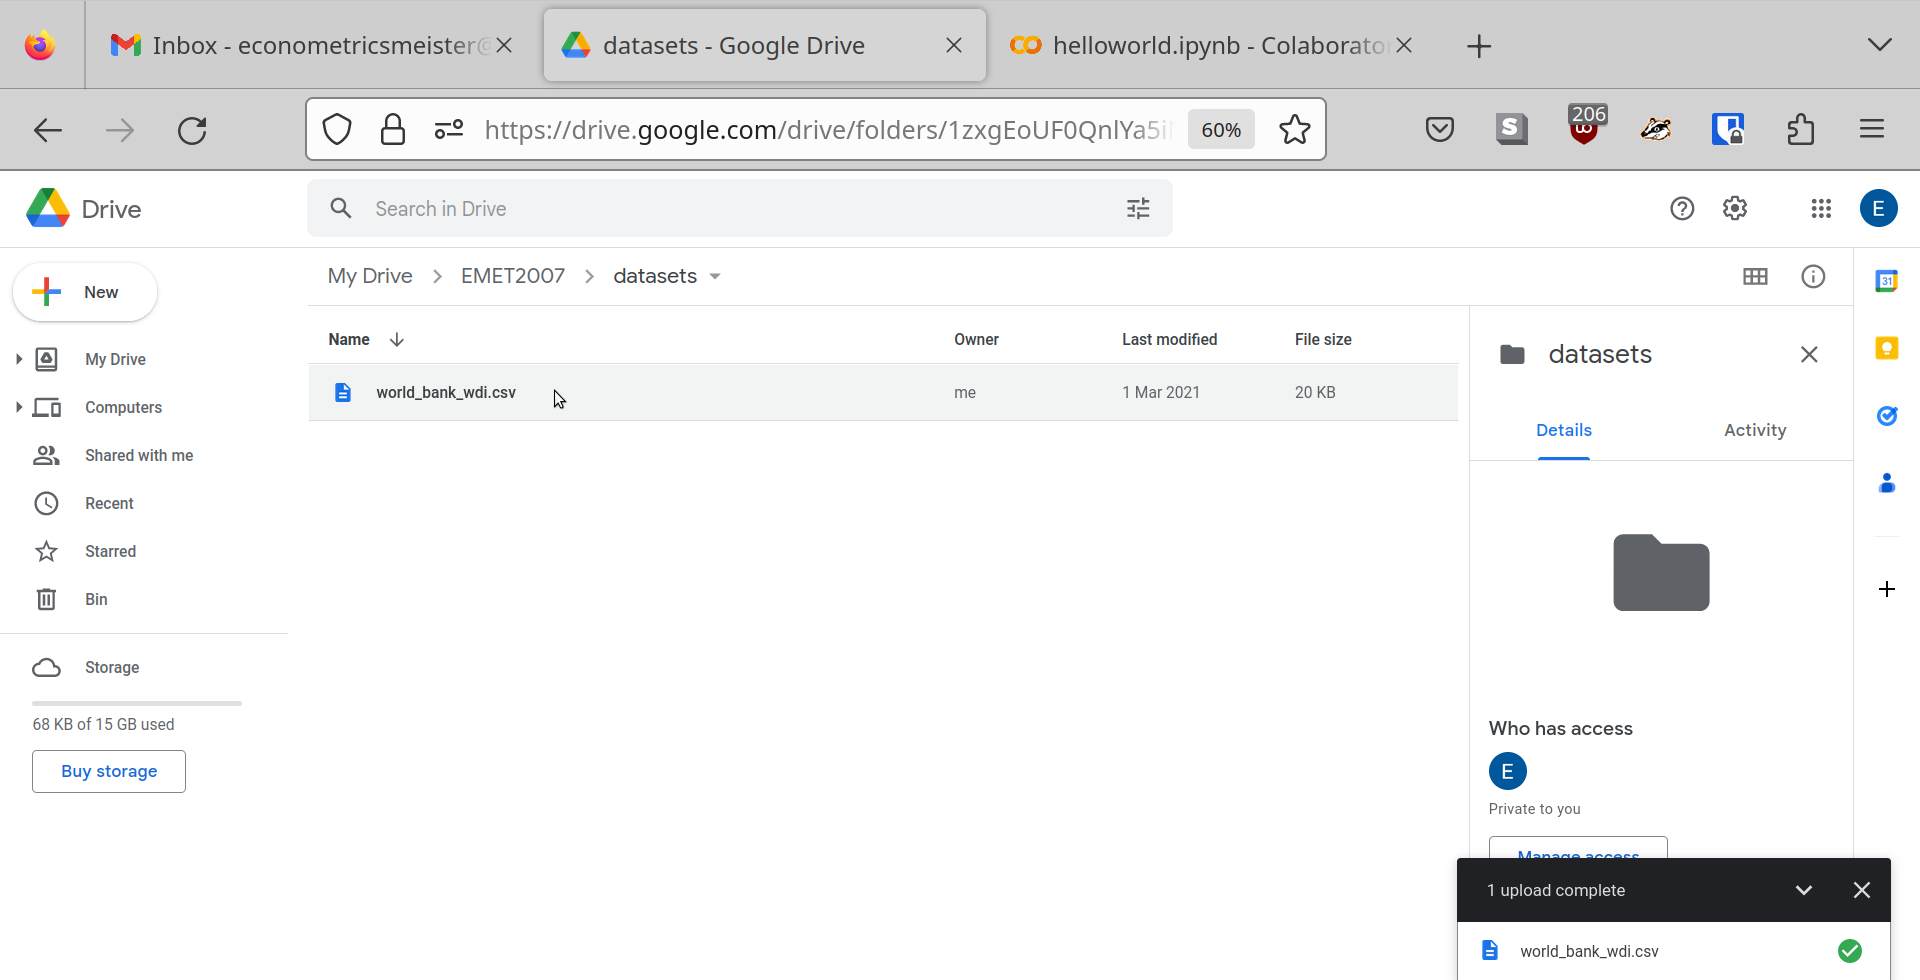
Put a data set inside the datasets folder. Find the World Development Indicators dataset
world_bank_wdi.csv on my course website (under Datasets) , save it to your local
computer. Then in Google Drive go into your datasets folder and do a file upload, like so:
Step 8
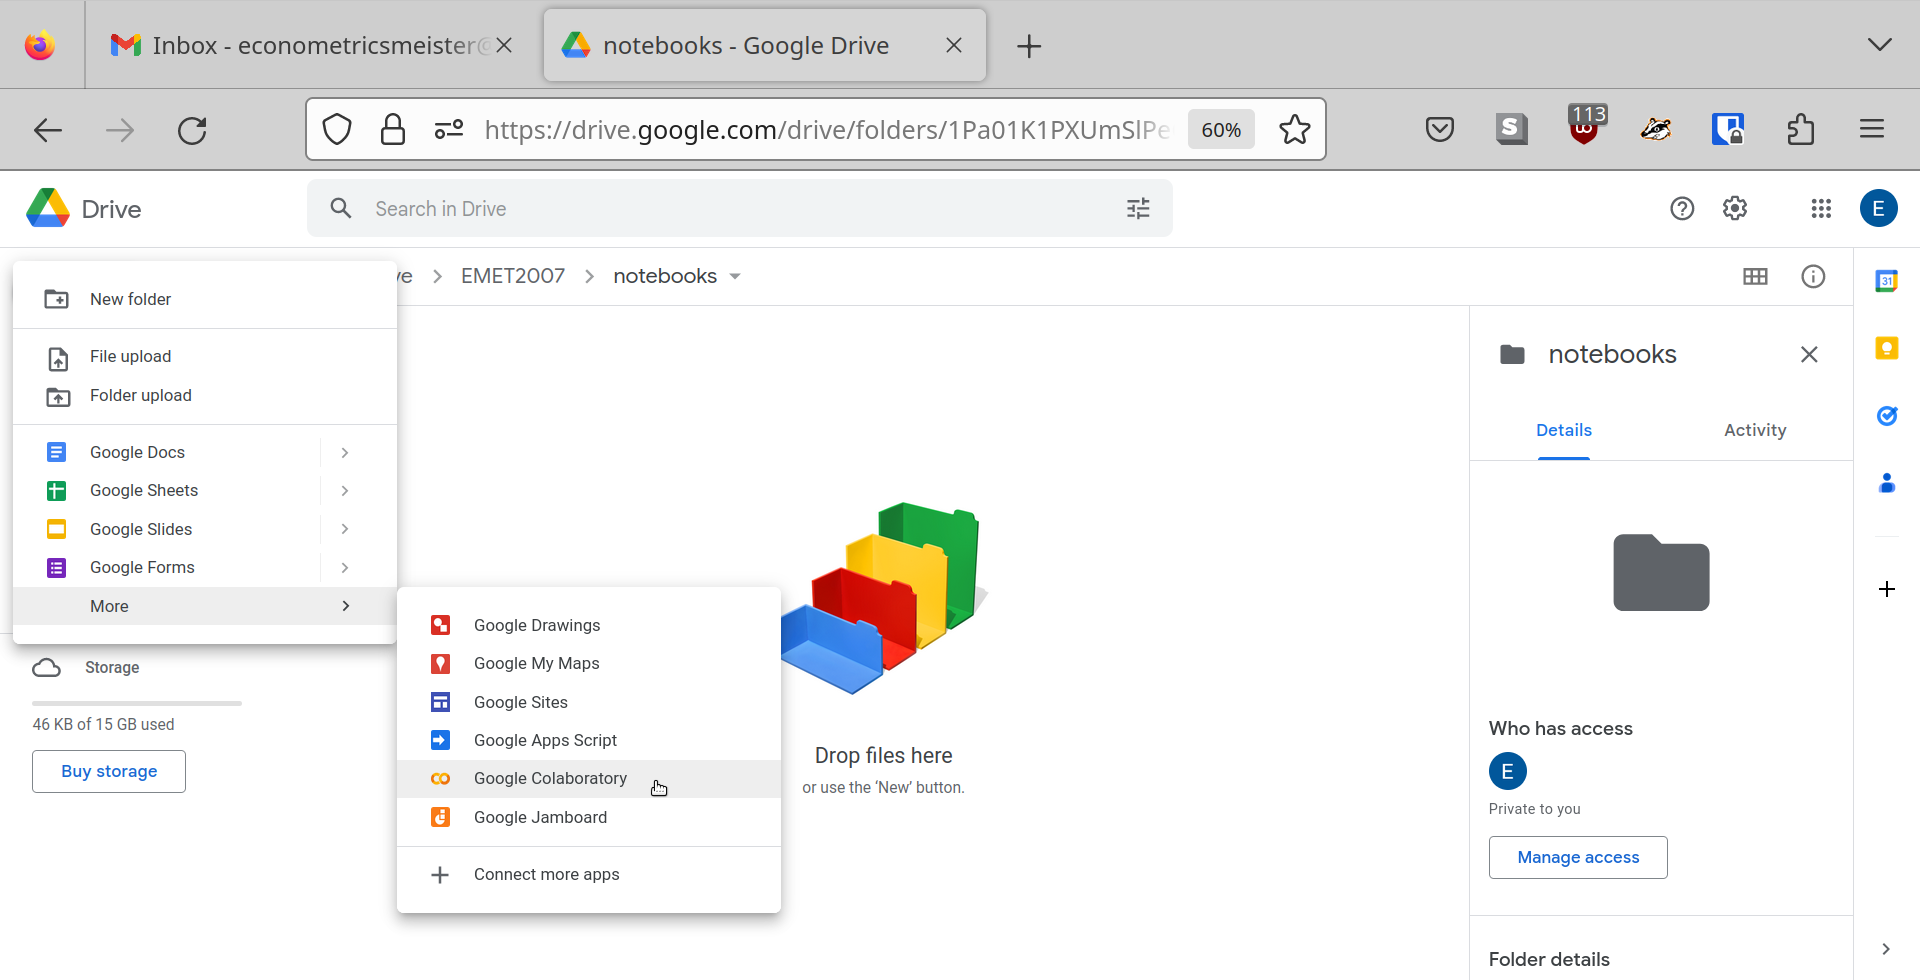
Navigate into your notebooks folder. Once there, create your first Jupyter notebook by
clicking on New and selecting Google Colaboratory.
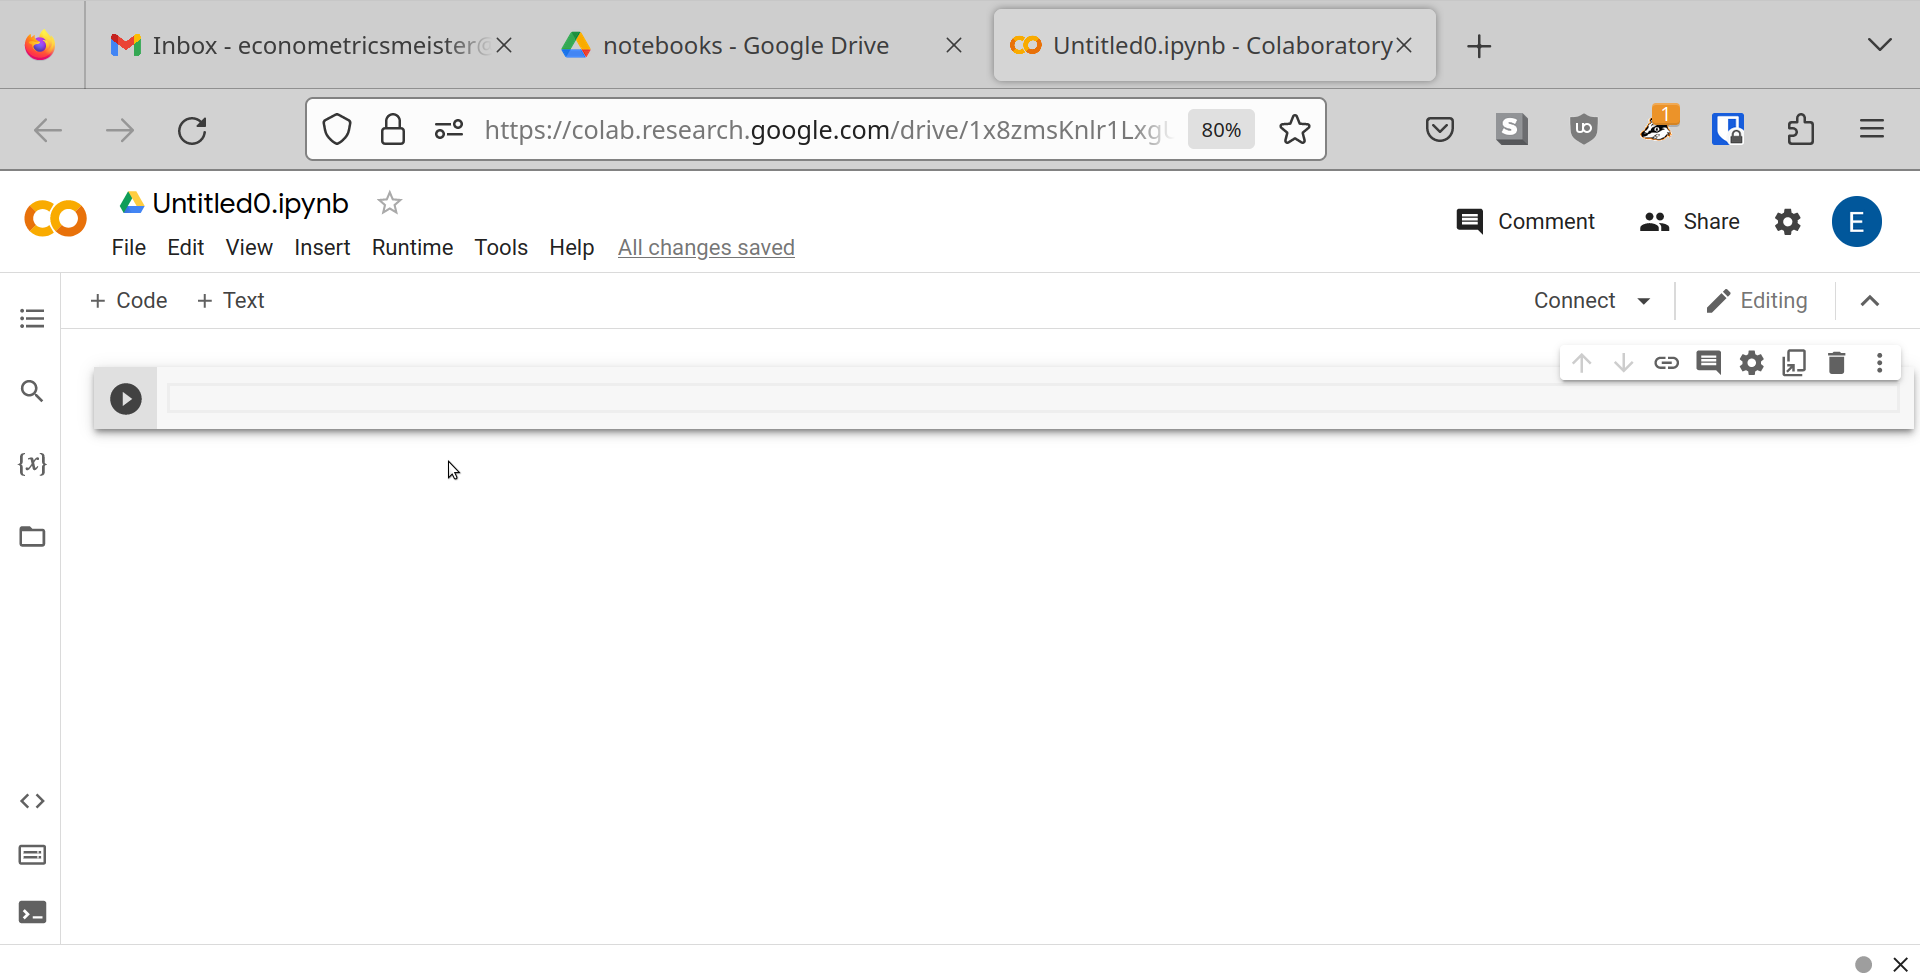
A new window will open and it contains your first Jupyter notebook. Woohoo!
Step 9
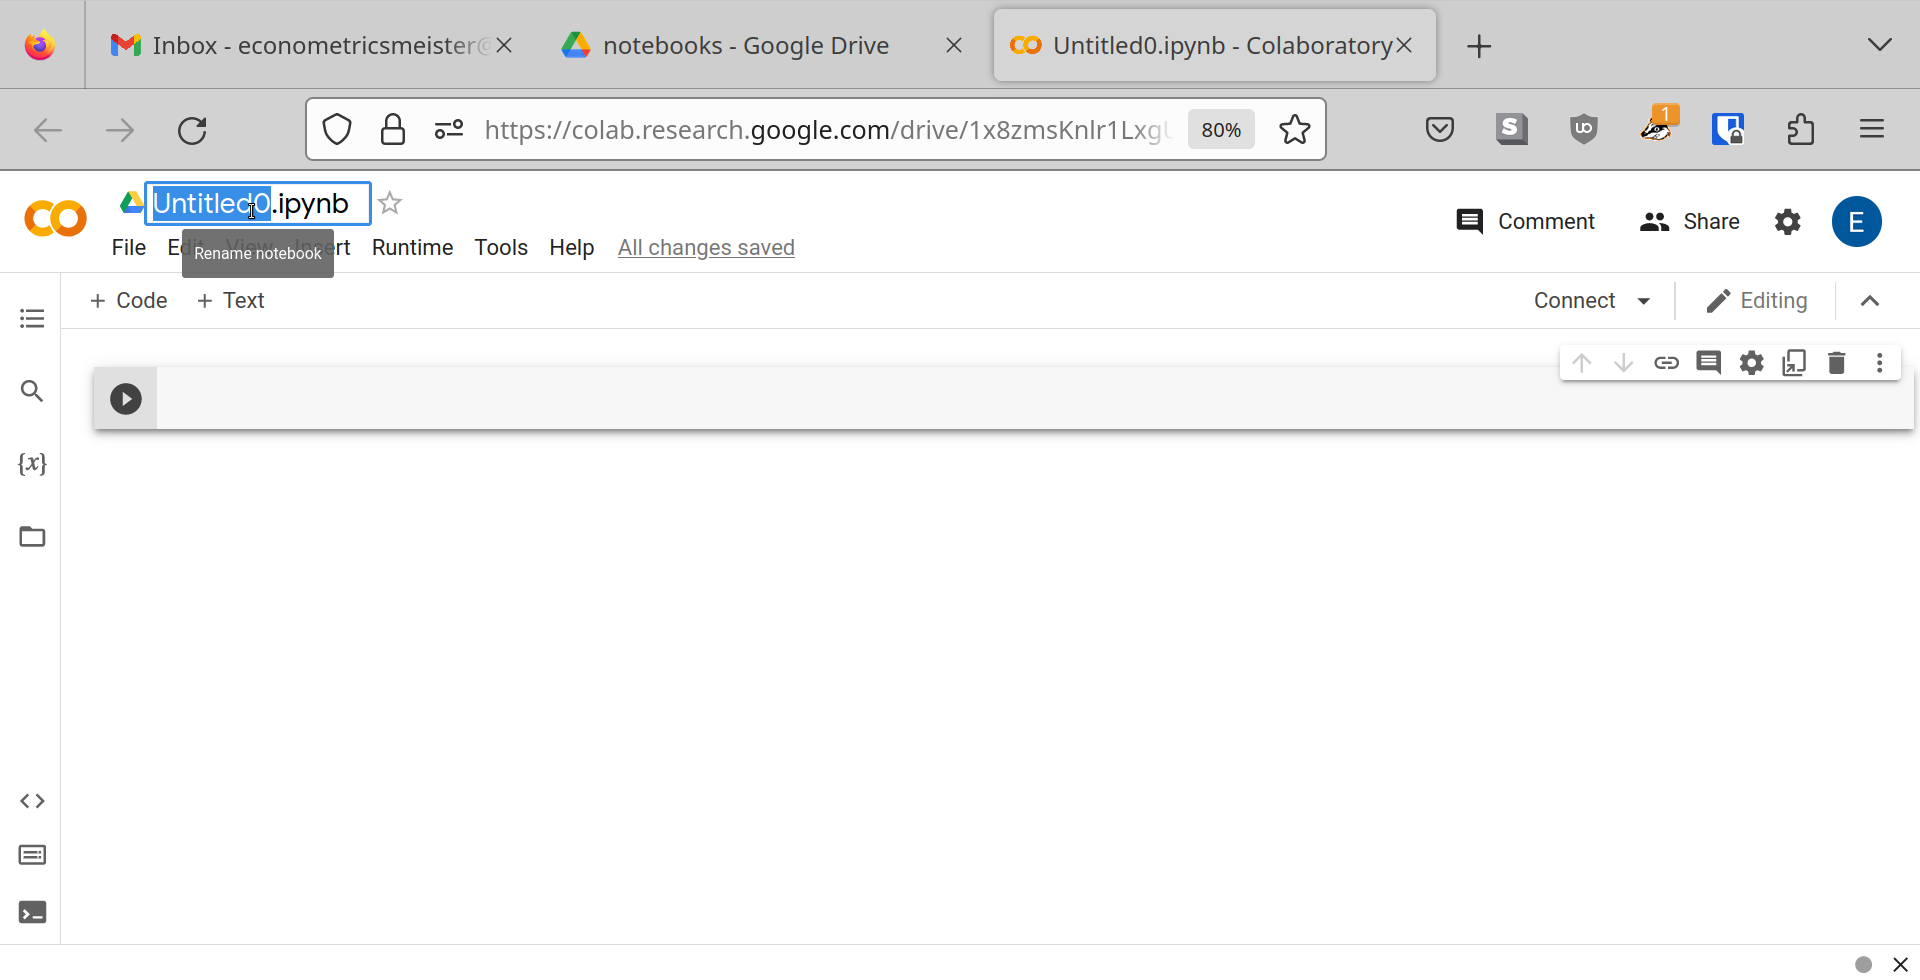
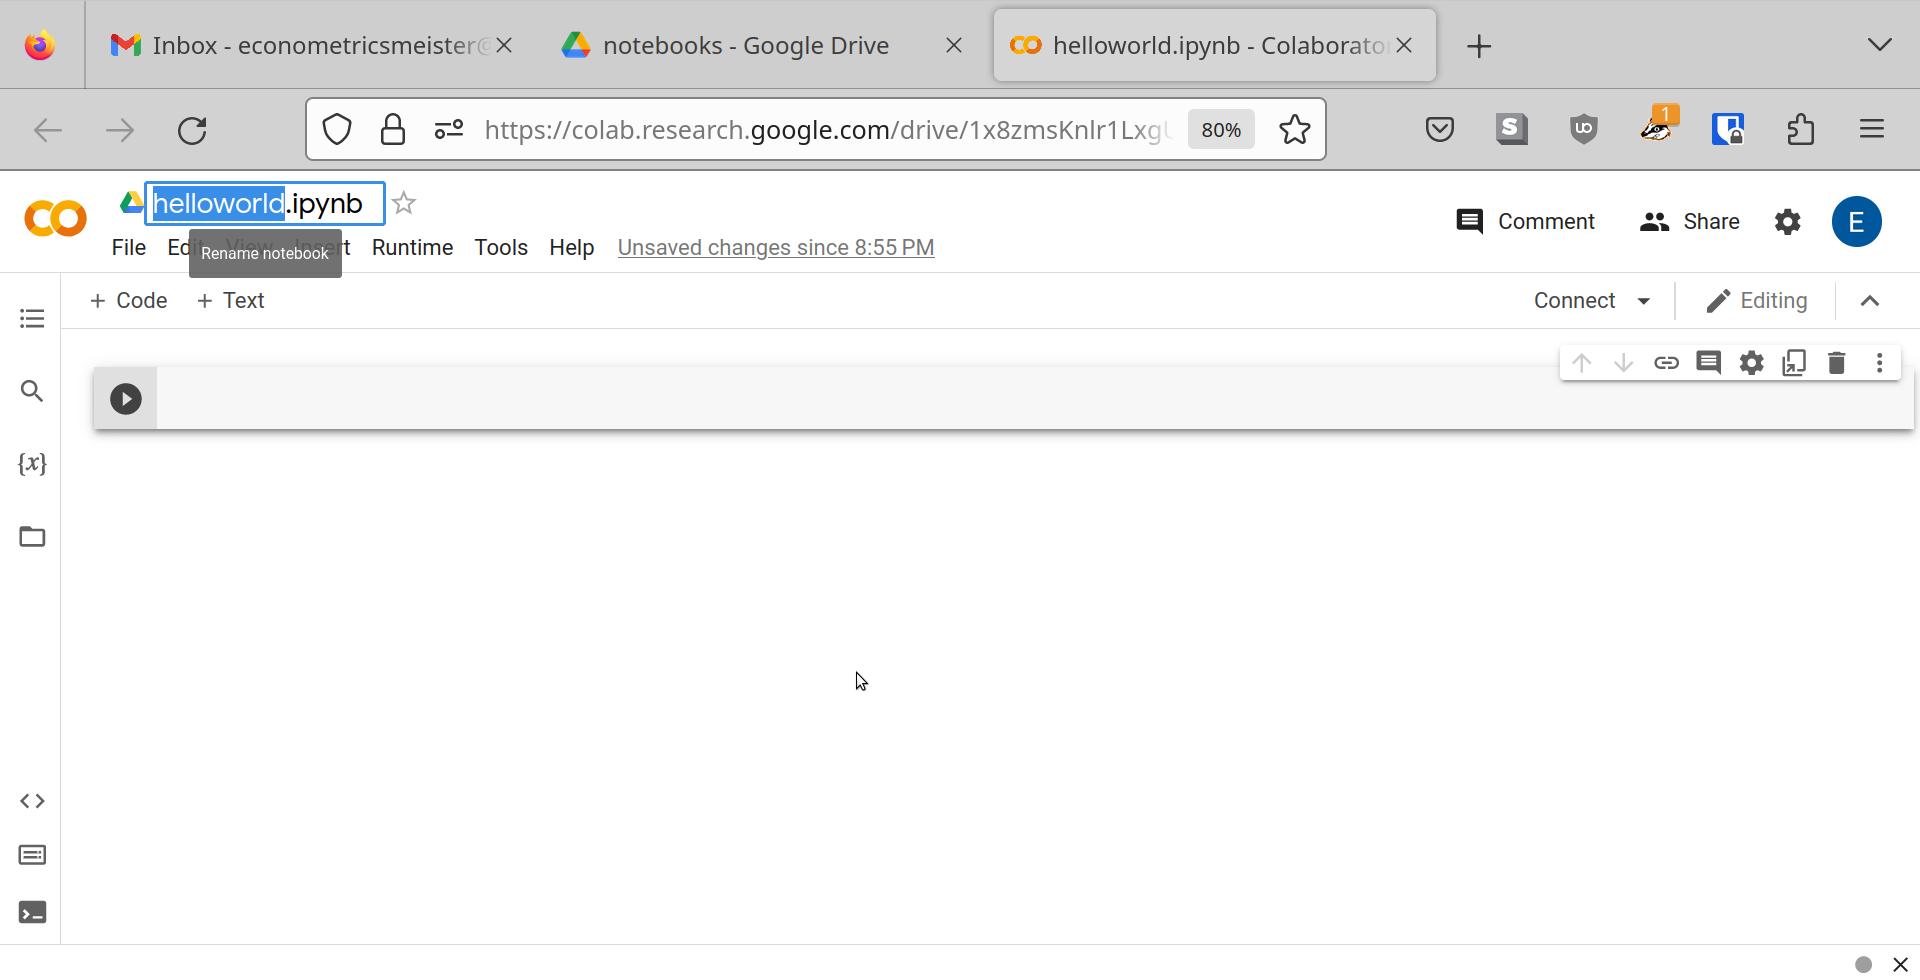
Change its name from the default Untitled0.ipynb to helloworld.ipynb.
Step 10
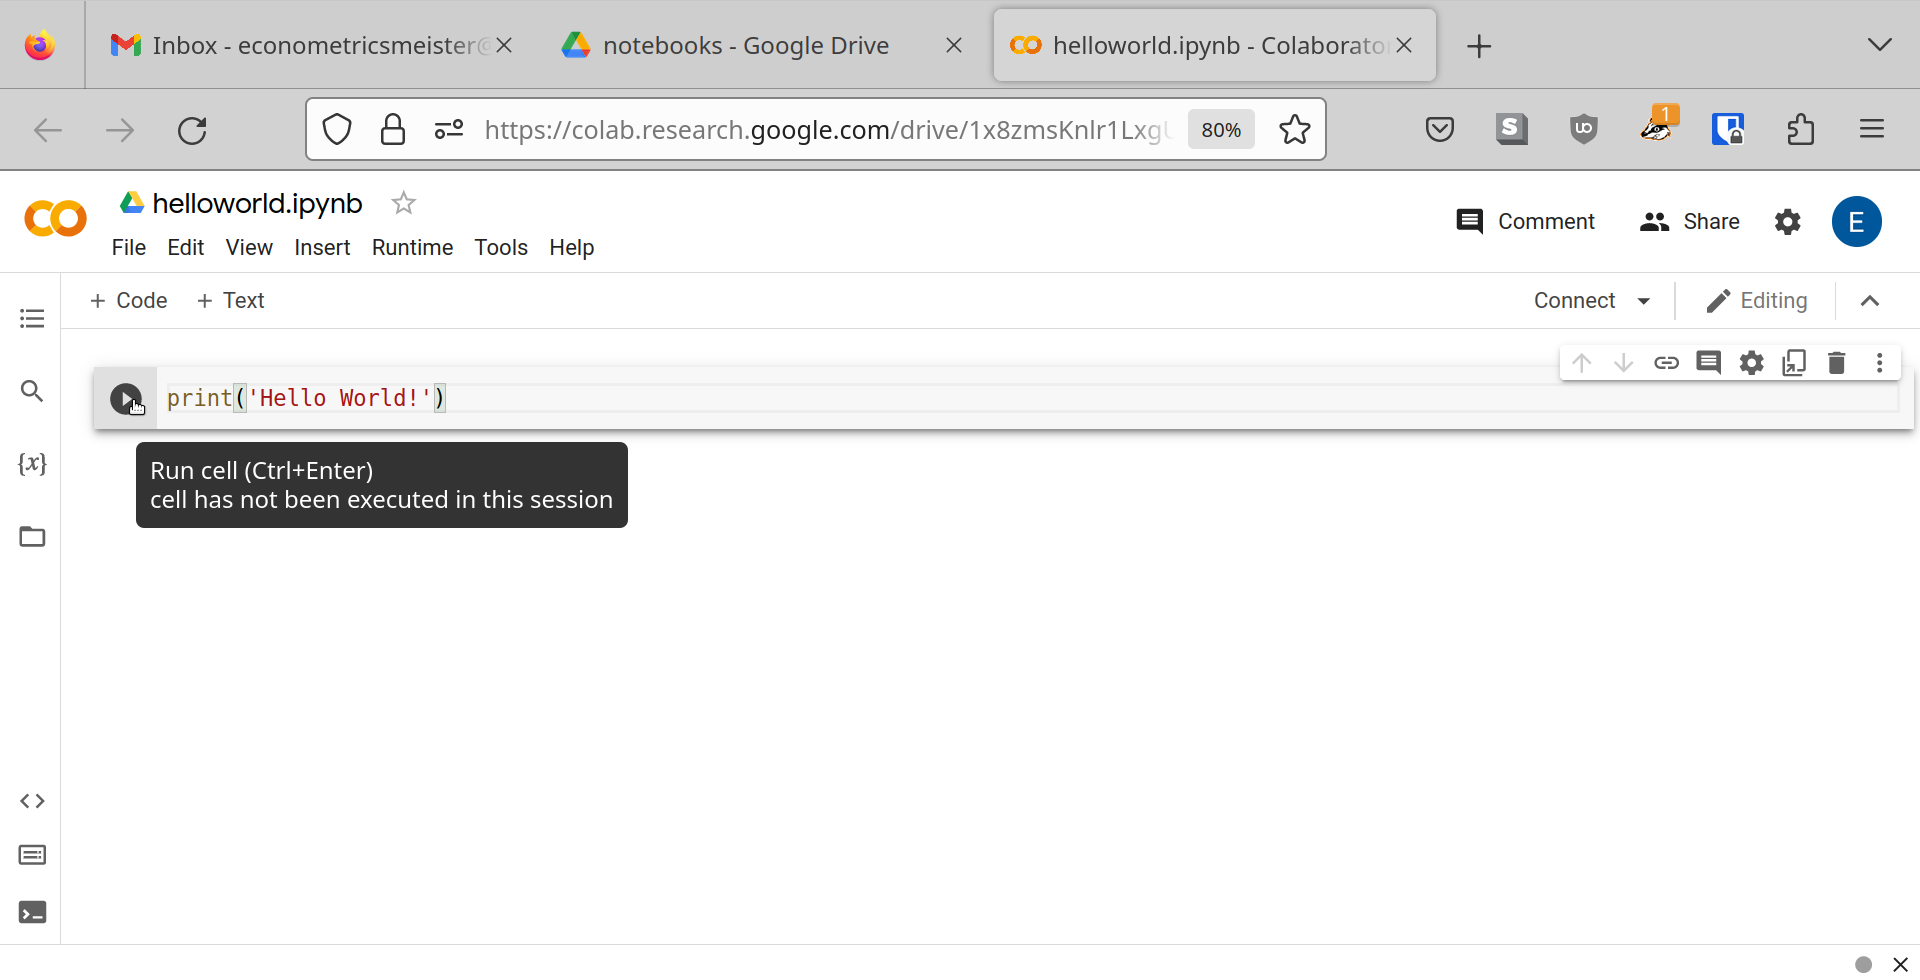
Write your first line of code:
Step 11
Execute your line of code. You can do this in two ways:
click on the play symbol, or
press
Ctrl+Enteron your keyboard
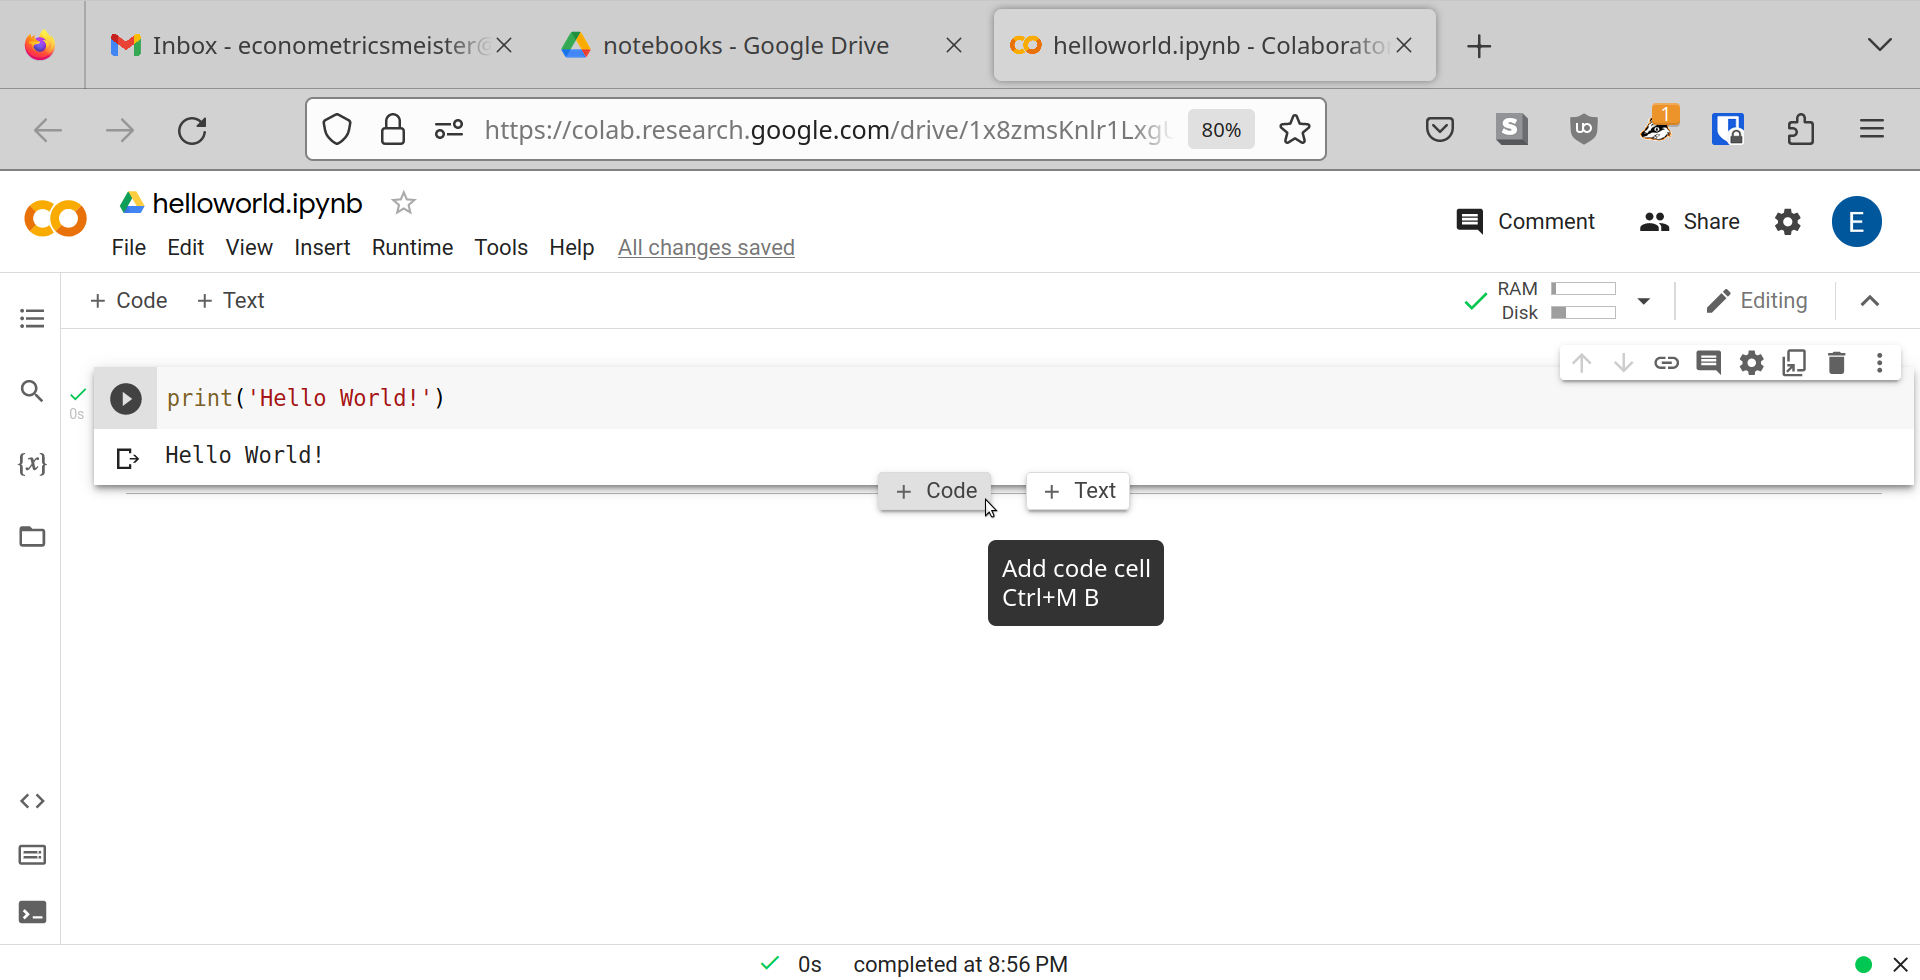
Once you do this, Colab will build a connection for you (which takes a few seconds) and run the line of code. At this step, a lot of stuff is going on in the background. Google creates a little yet powerful remote computer that can run a rich Python environment for you.

There you have it:
Welcome to the world of Python coders!
Step 12
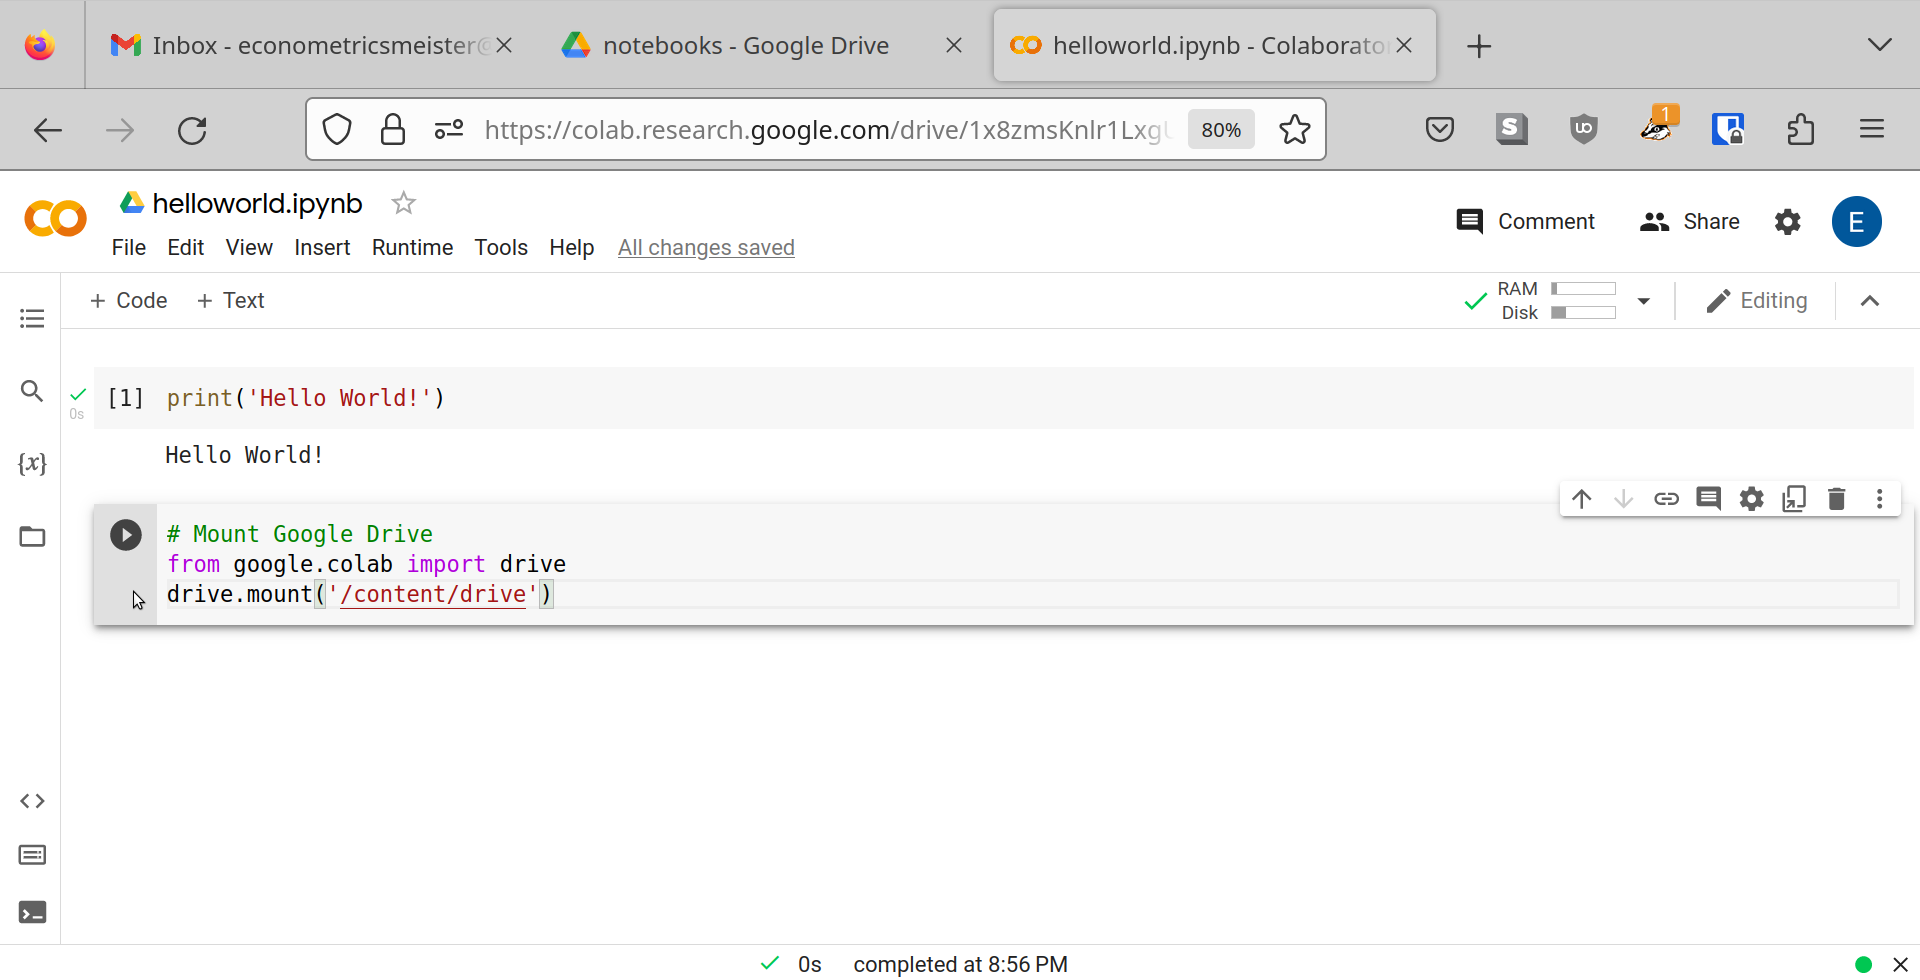
Let’s do some more coding while we’re at it. We want to be able to use our Excel-created data sets to do econometric work. To do that, we need to allow the Jupyter notebook to interact with Drive. We need to mount the Google drive to the Jupyter session.
To do so, we need to add new code cell. Look at the previous screenshot, can you spot how code cells are added? Two ways:
navigating with the mouse pointer to the bottom of an existing code cell will give you two pop-up buttons for the creation of code or text cells.
- via the keyboard shortcut:
Ctrl+M B(that’s the control key together with the M key, then the B key)
Create the new code cell and fill it like so:
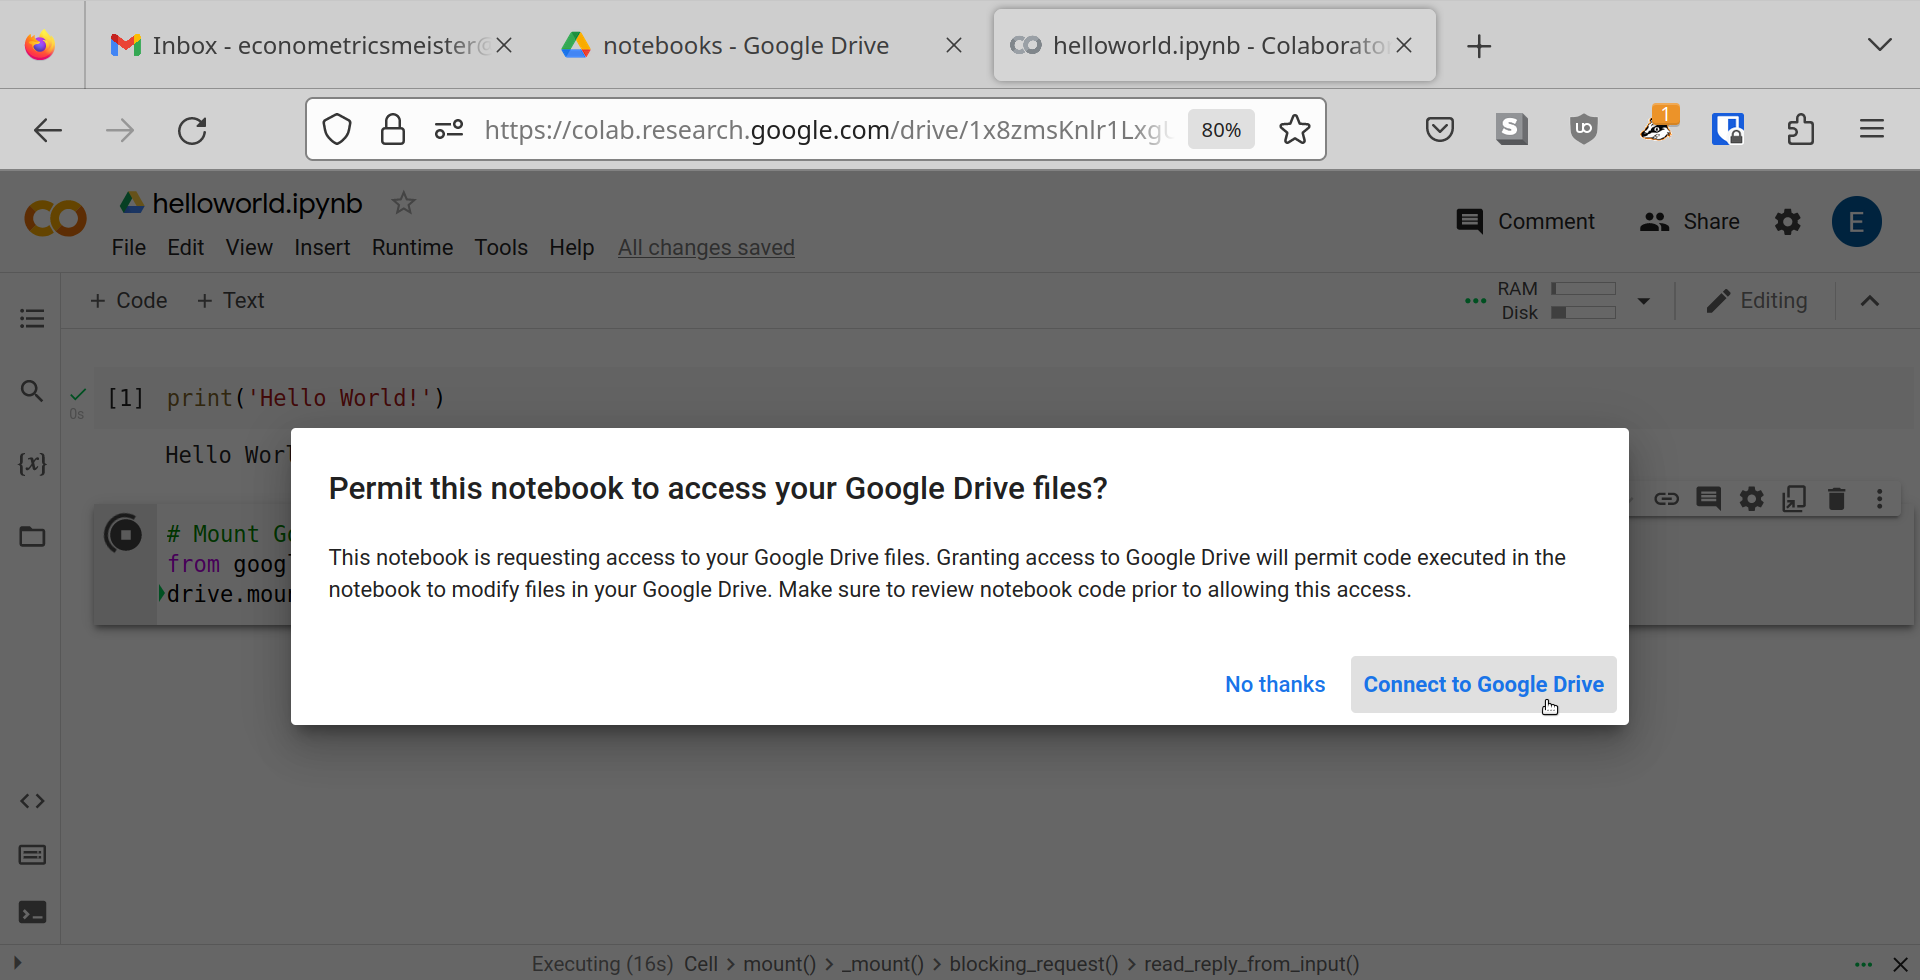
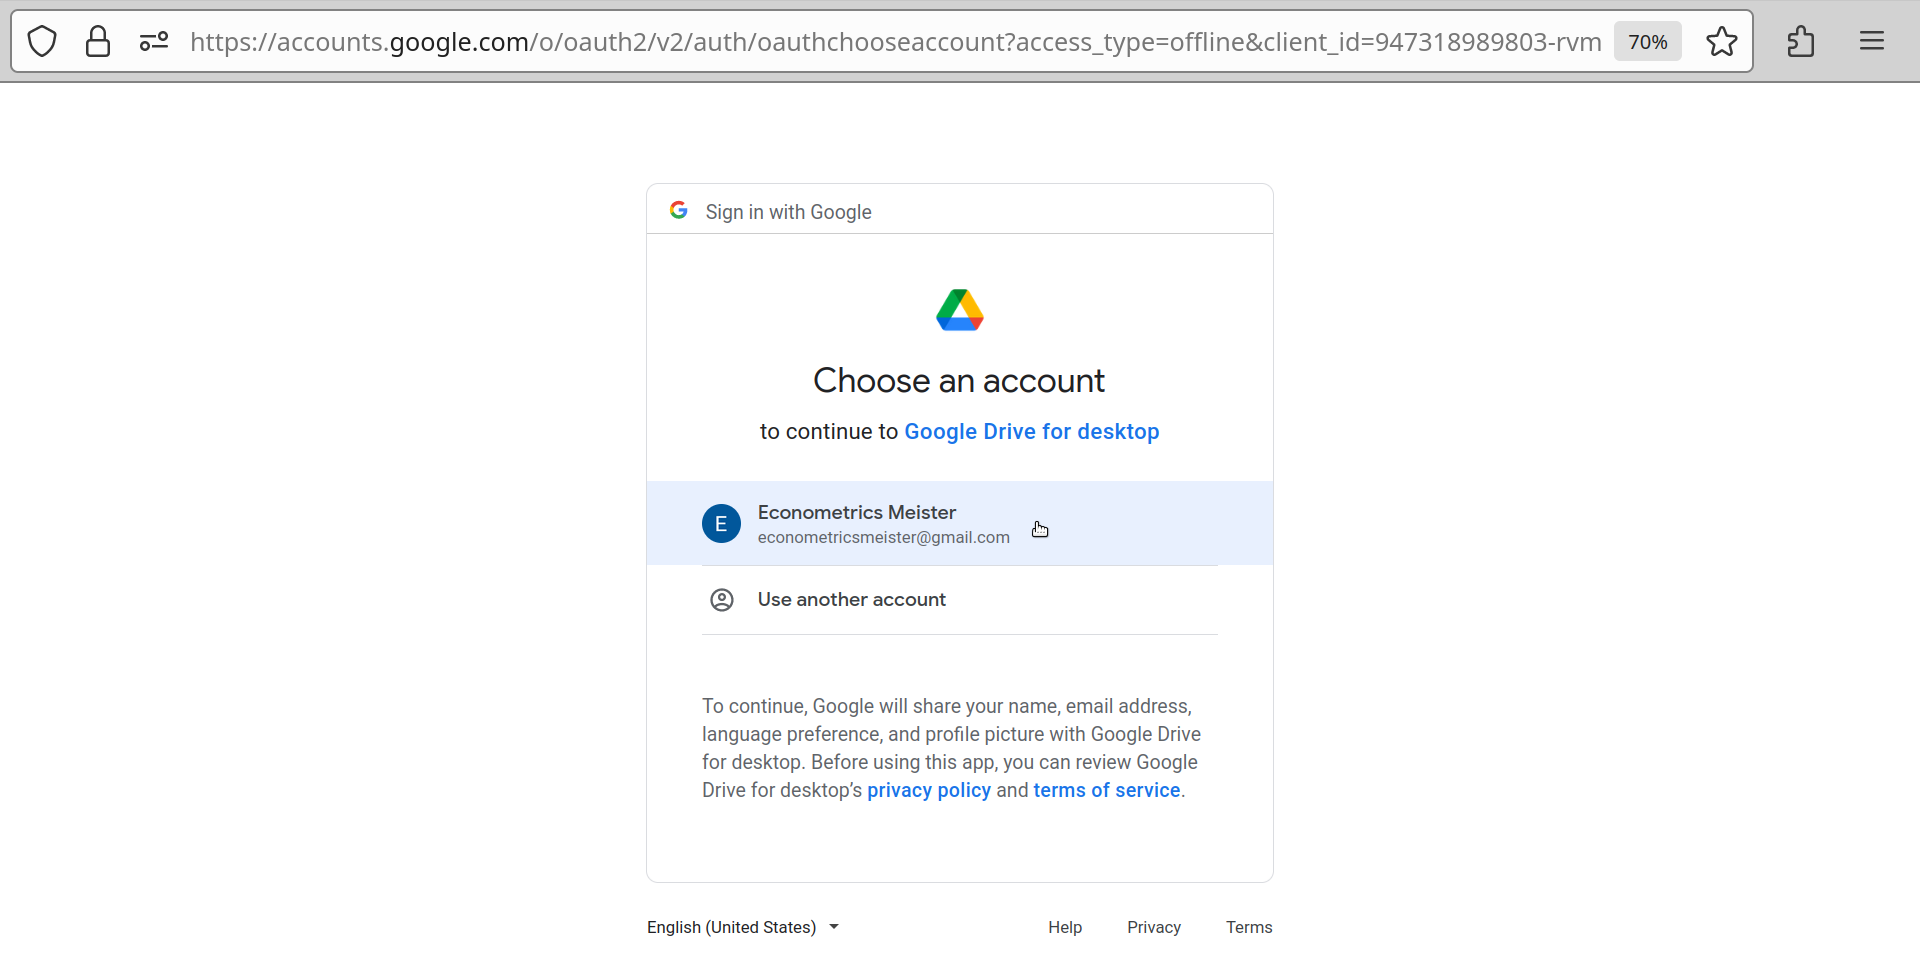
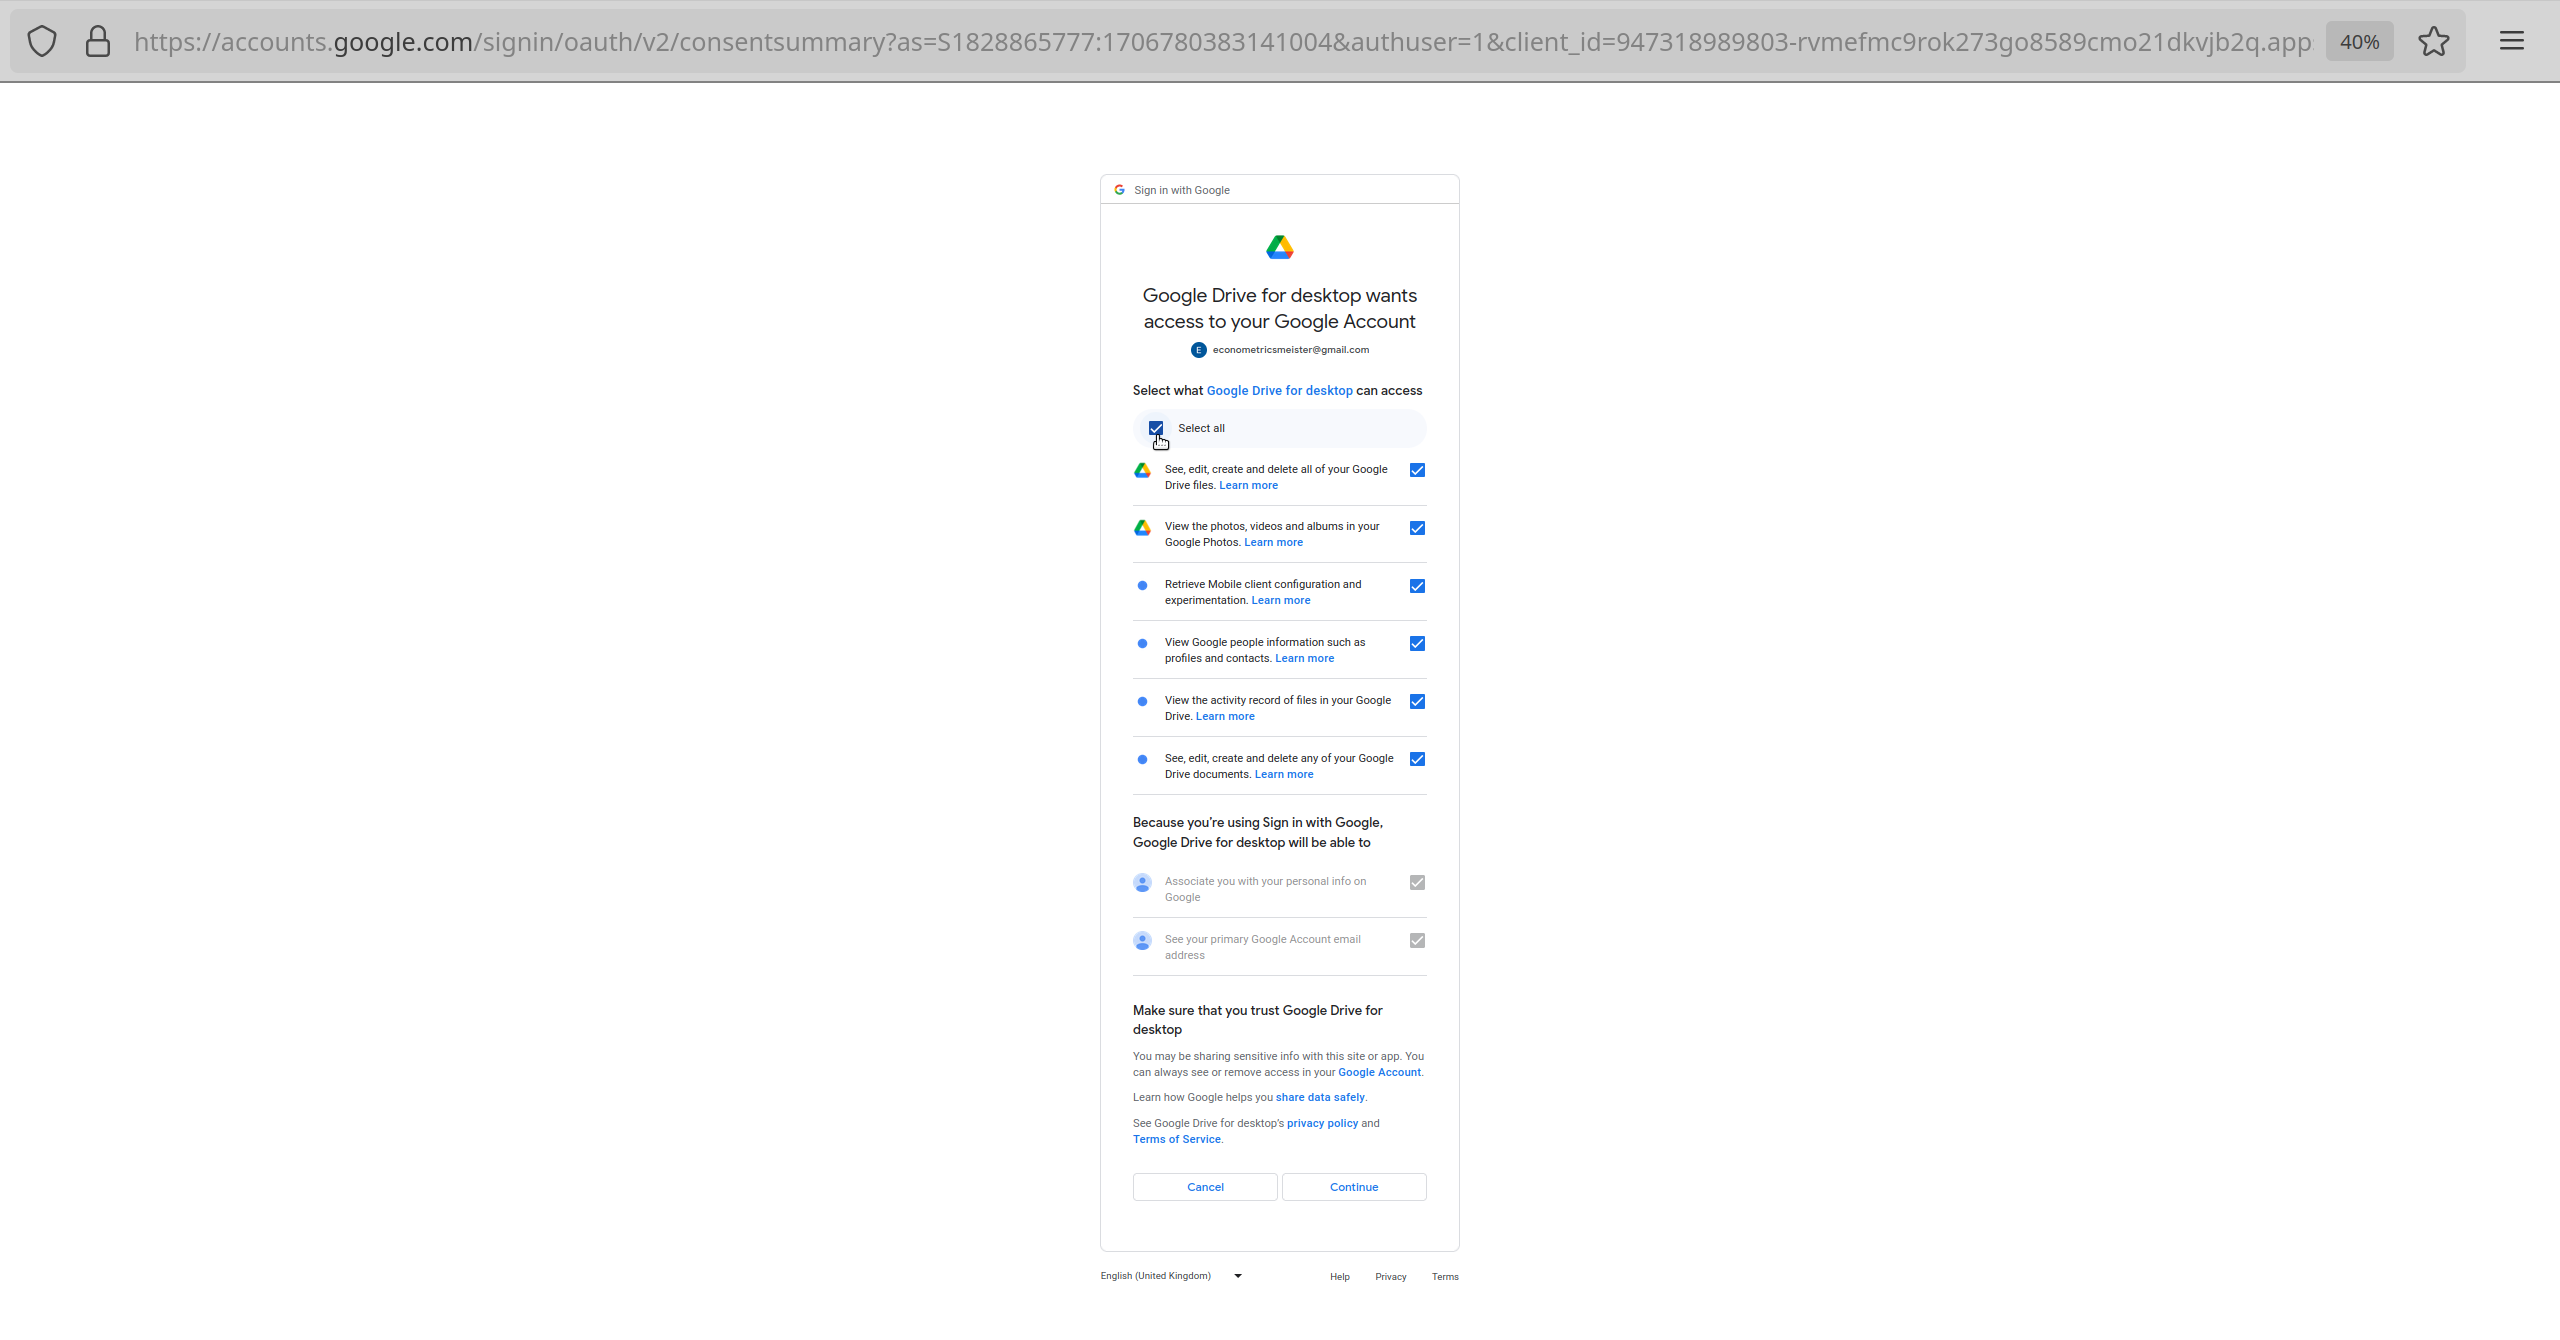
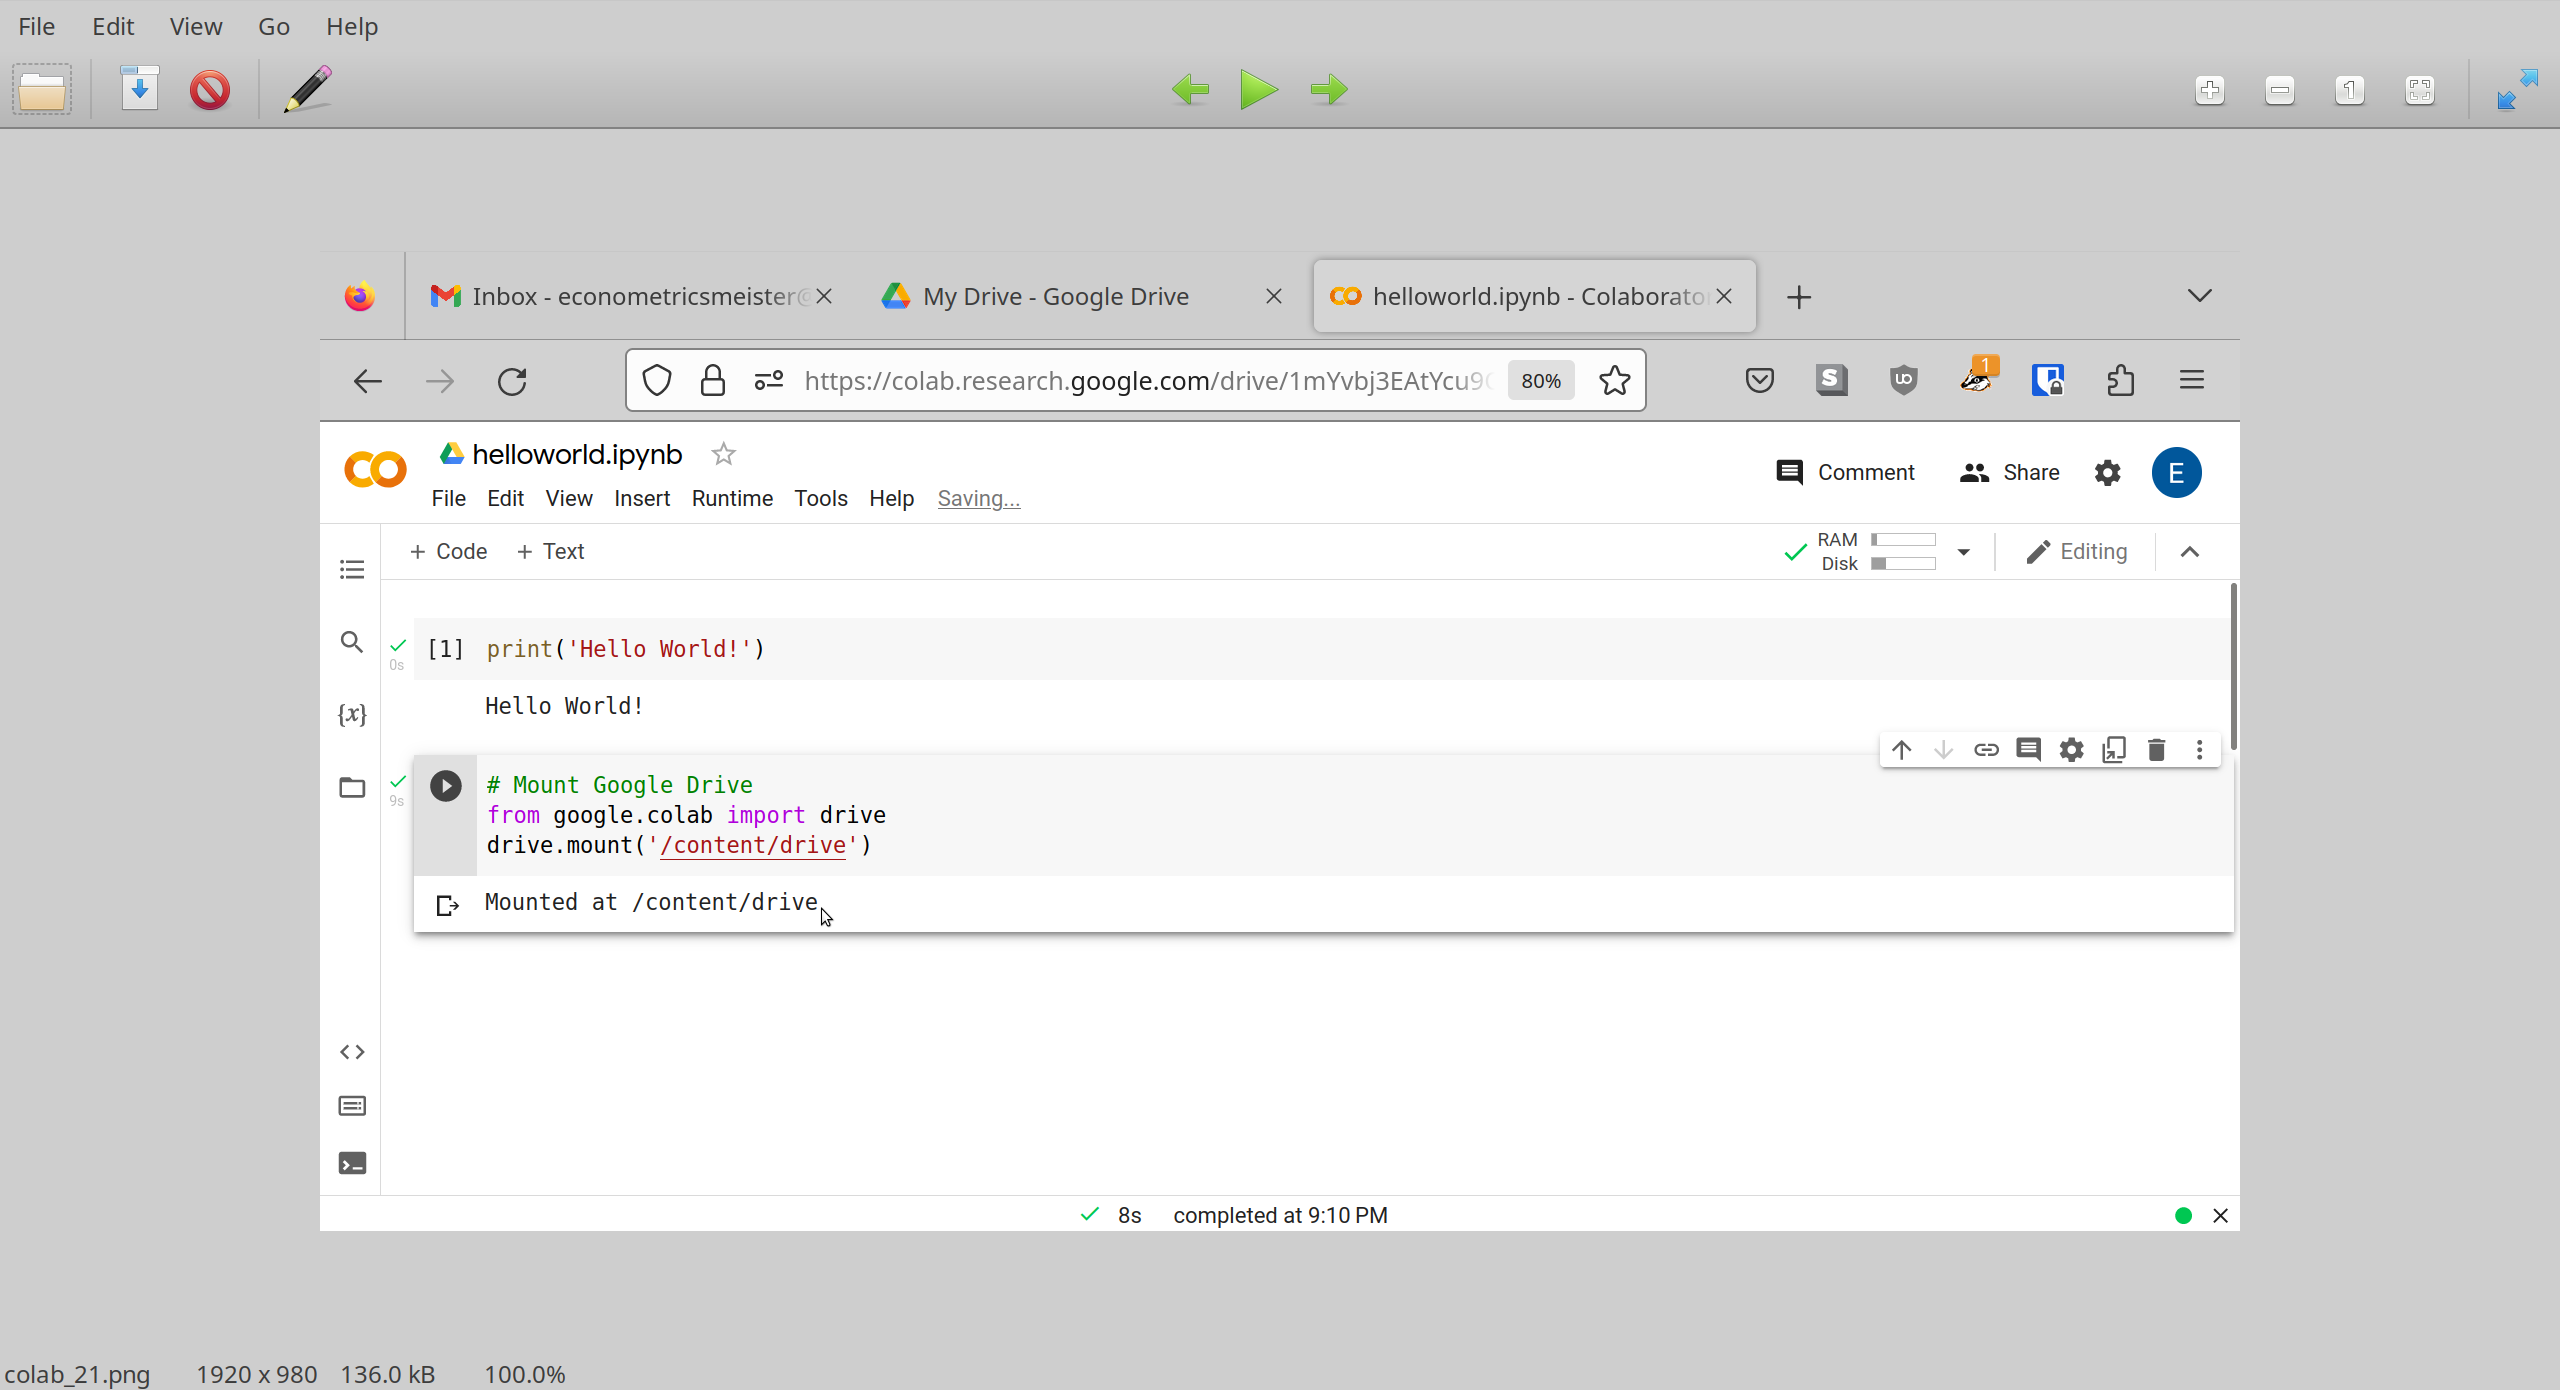
When you execute these lines of code, you will need to click yourself through these motions:
Step 13
Let’s think about how our files are organised on Google Drive. You can actually look at this in the Jupyter notebook by clicking on the file explorer icon:
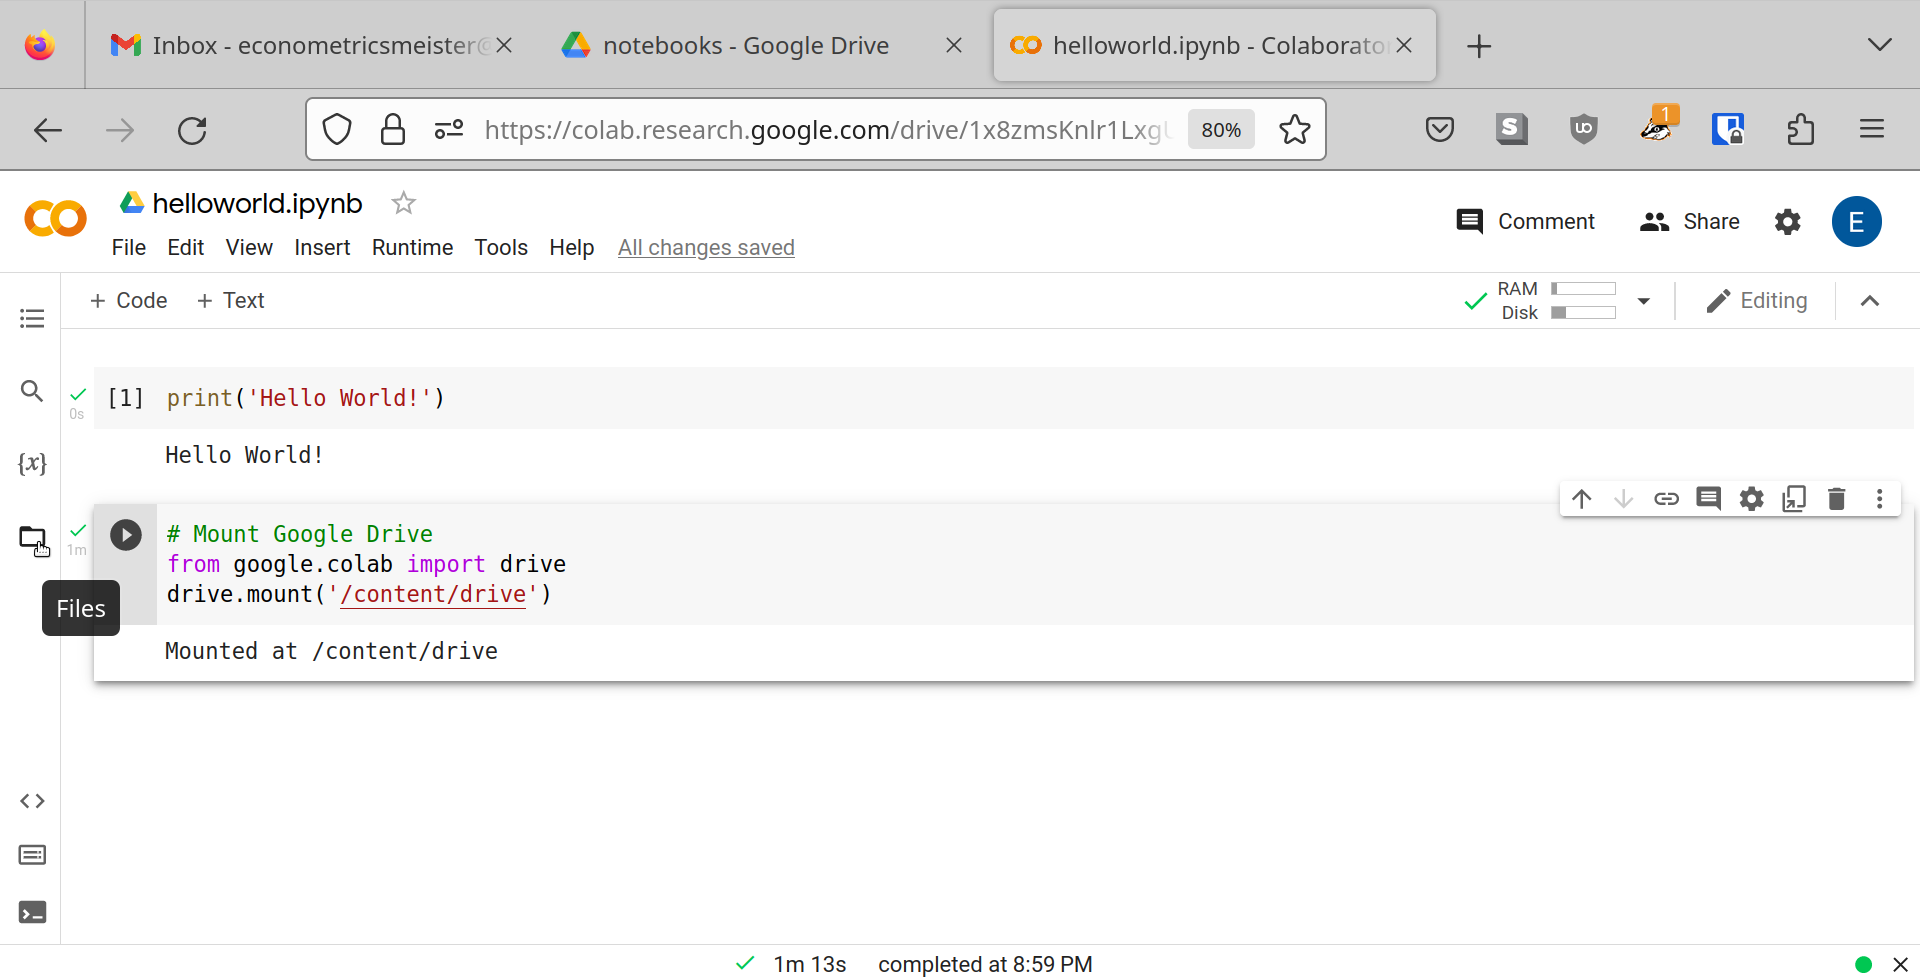
And then I navigated my way through the file tree:
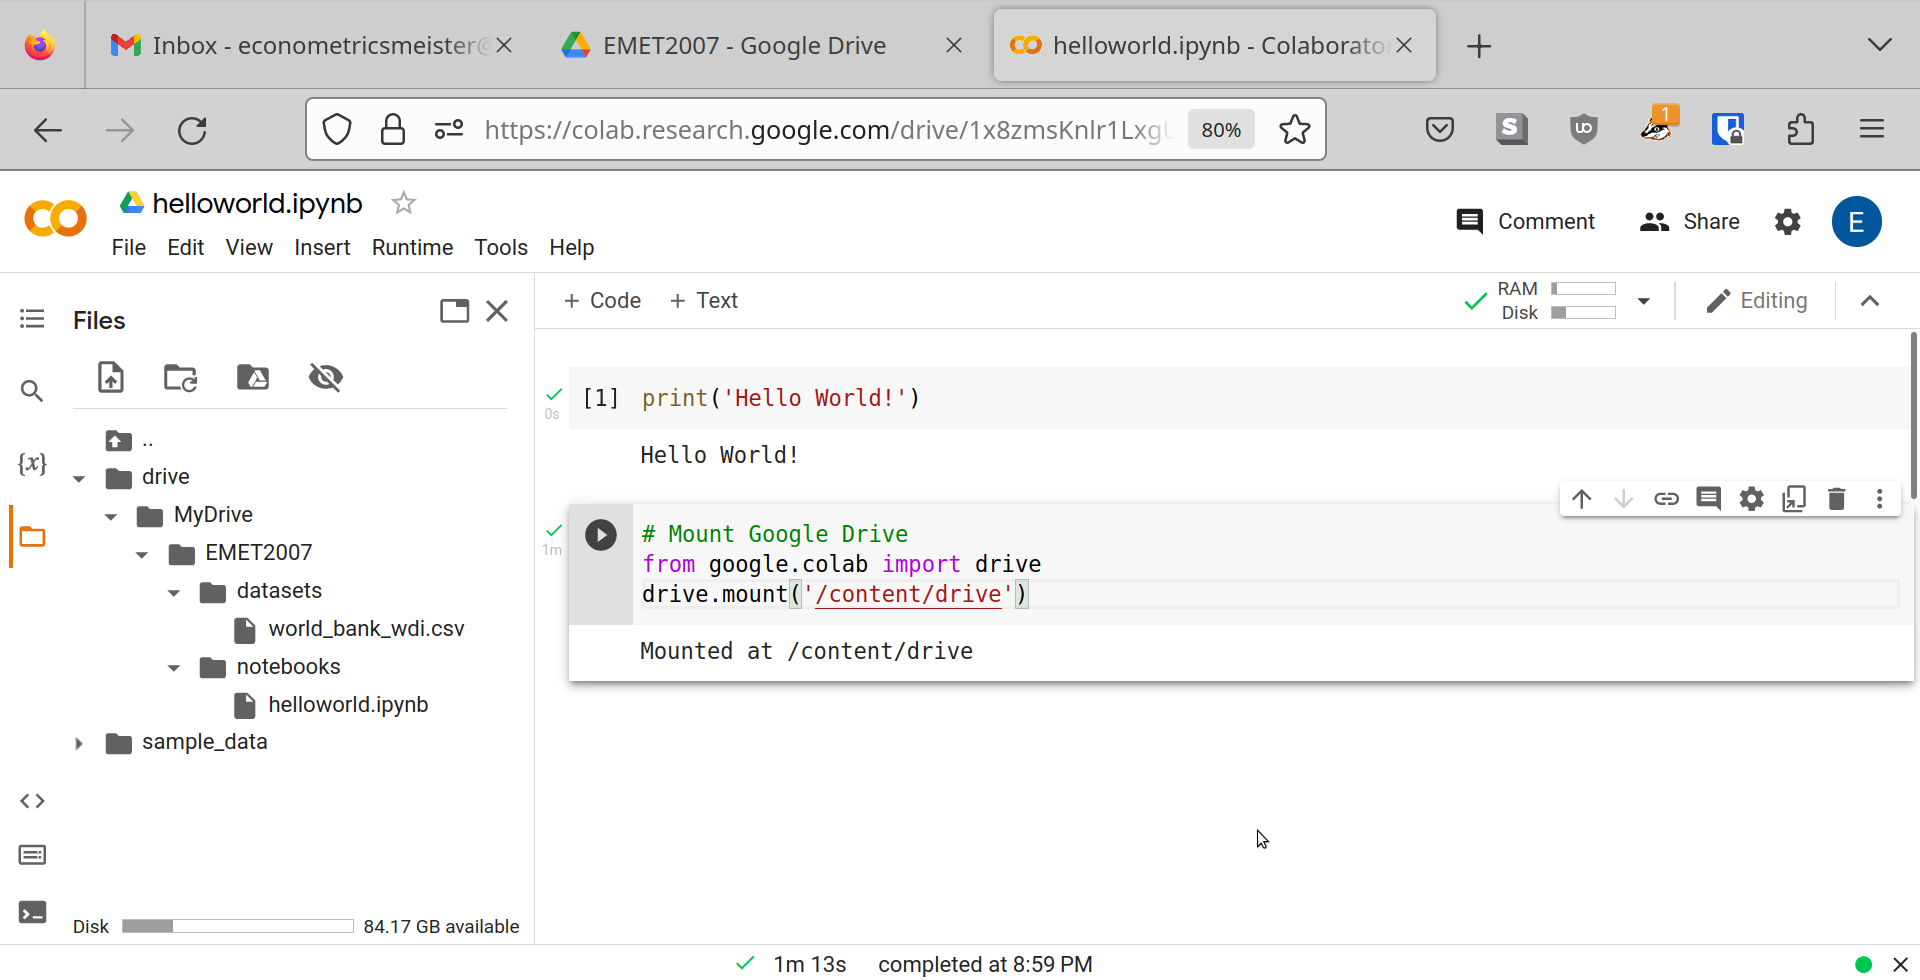
This shows you the locations (or paths) of two important files that you will need to keep track of:
your Jupyter notebook helloworld.ipynb (which you are currently editing) and your data set
world_bank_wdi.csv. You can read off their precise file paths as:
/content/drive/MyDrive/EMET2007/notebooks/helloworld.ipynb, and/content/drive/MyDrive/EMET2007/datasets/world_bank_wdi.csv
Step 14
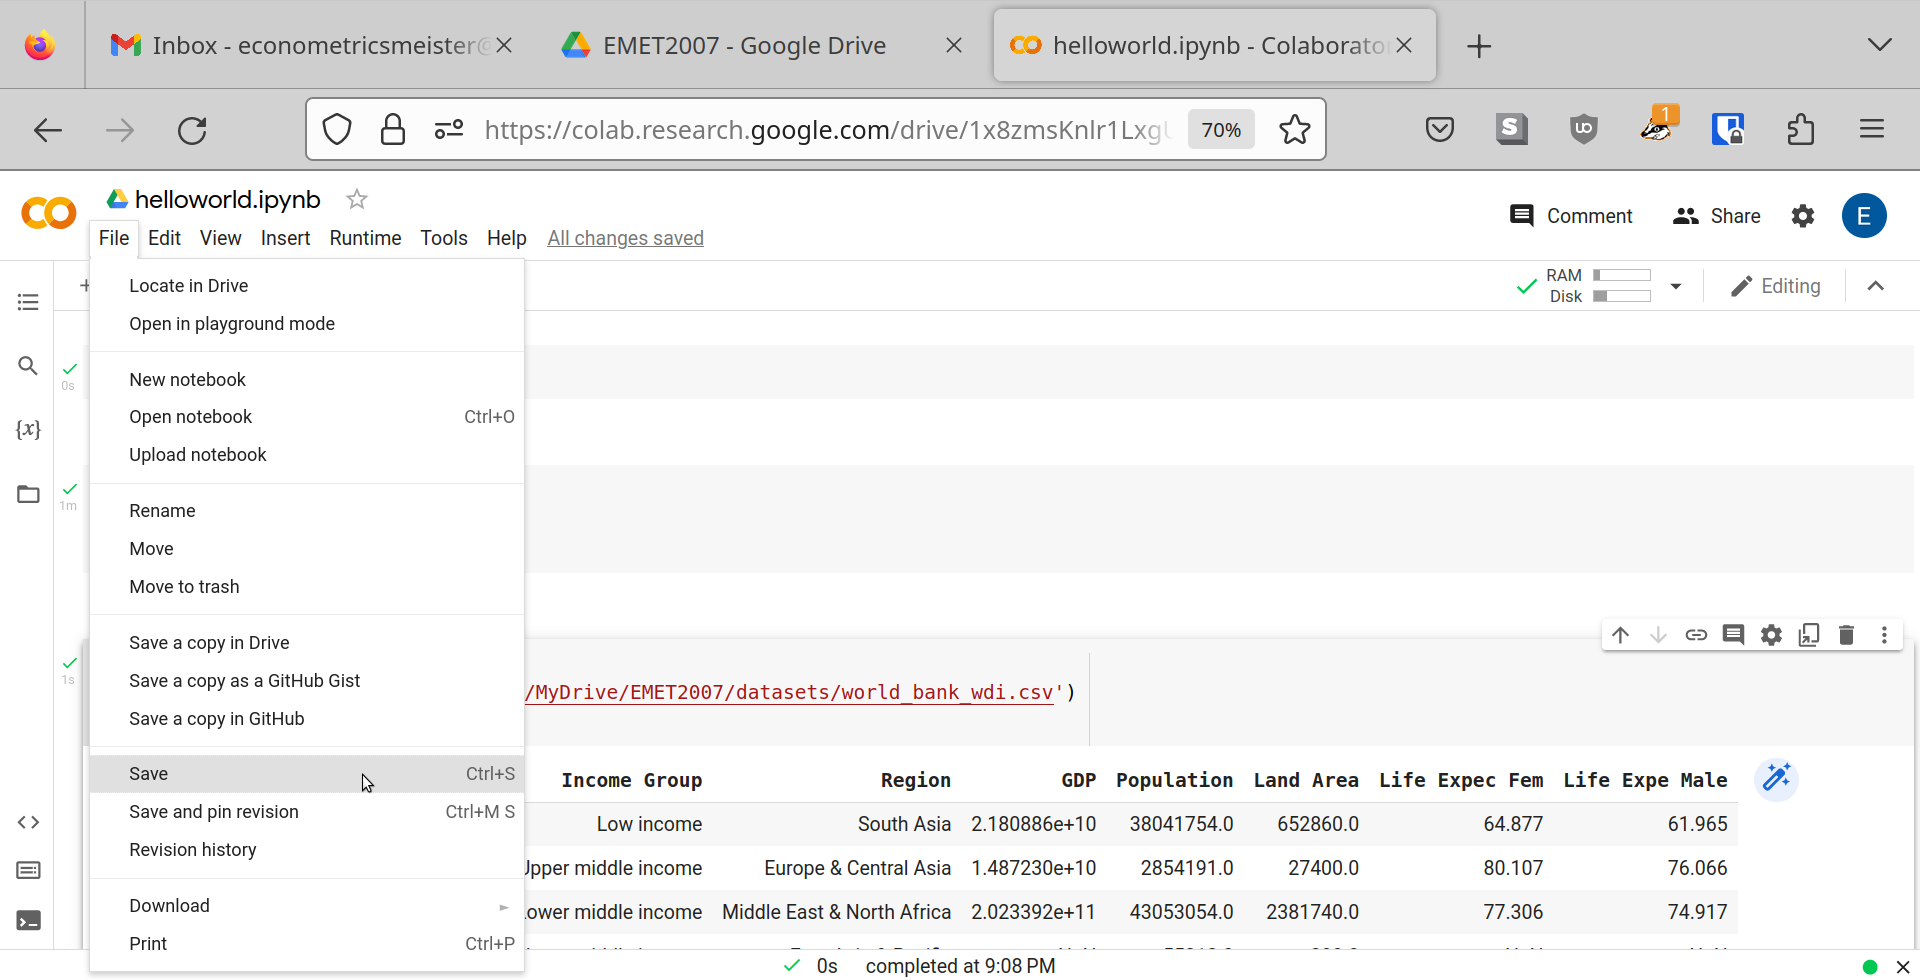
Type the following lines of code to import the World Bank data set into Jupyter:
import pandas as pd
df = pd.read_csv('/content/drive/MyDrive/EMET2007/datasets/world_bank_wdi.csv')
df.head()
Like so:
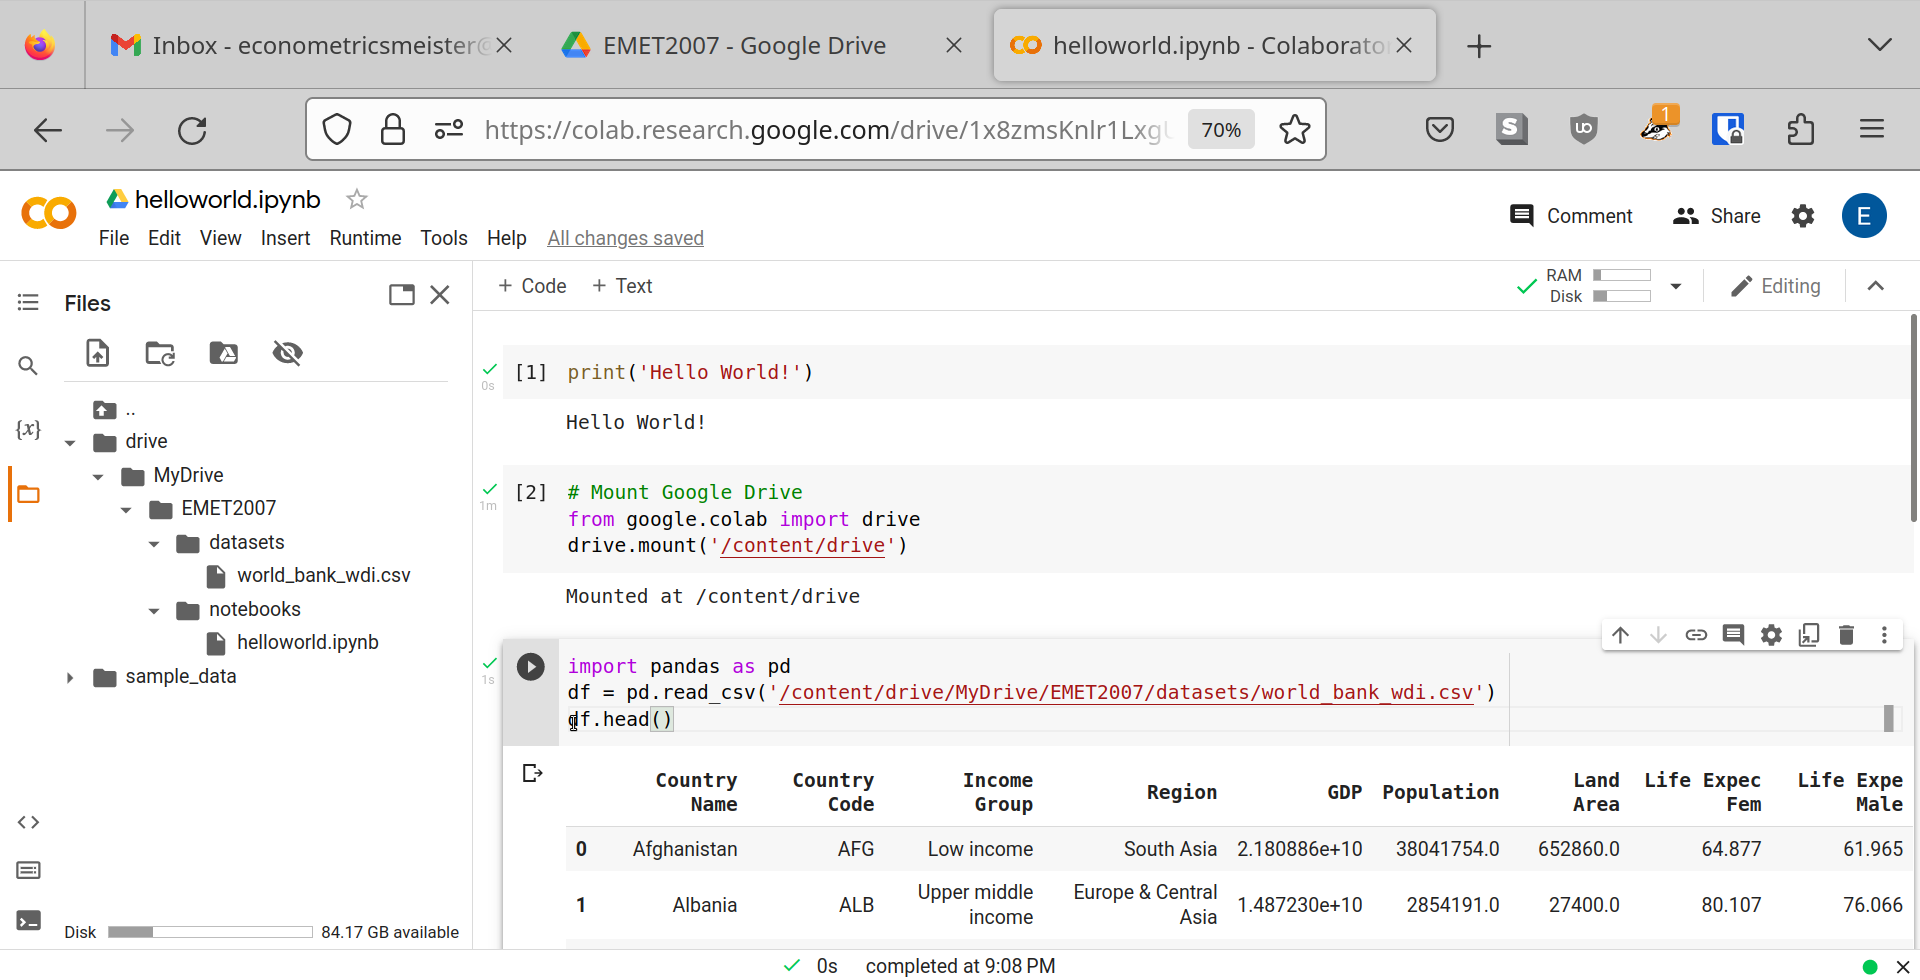
Here we are using the so called Pandas package of Python to import a csv-file. We are using the
Pandas command read_csv. It is crucial that we tell the read_csv command where precisely
it can find the file in our Google Drive, which is why we input the precise location inside the
round parentheses.
Furthermore, the read_csv command converts the csv-file into a so-called Pandas data frame.
We give it the name df.
In the last line, when we type df.head(), we are using the Pandas head command to show us
the top part (the head) of the data frame df.
We see that the data contains information about countries, their income groups, GDP, population, etc.
Step 15
Never forget to save your work!
